Marlin Tyre and Mechanical Workshop Software includes a flexible module for conducting and recording stocktakes.
Stocktakes can be accessed by selecting Daily Activity > Stocktake from the menu bar.

The stocktake window will open on the Search page, showing a list of open stocktakes for the current branch.

Adjusting individual items can be done without needing to begin a stocktake.
Adding Stocktakes
Daily Activity > Stocktake
At the top-right of the Stocktake Search list, click on the Add action button.

The Add pop-up window will open, containing a form for adding a new stocktake.
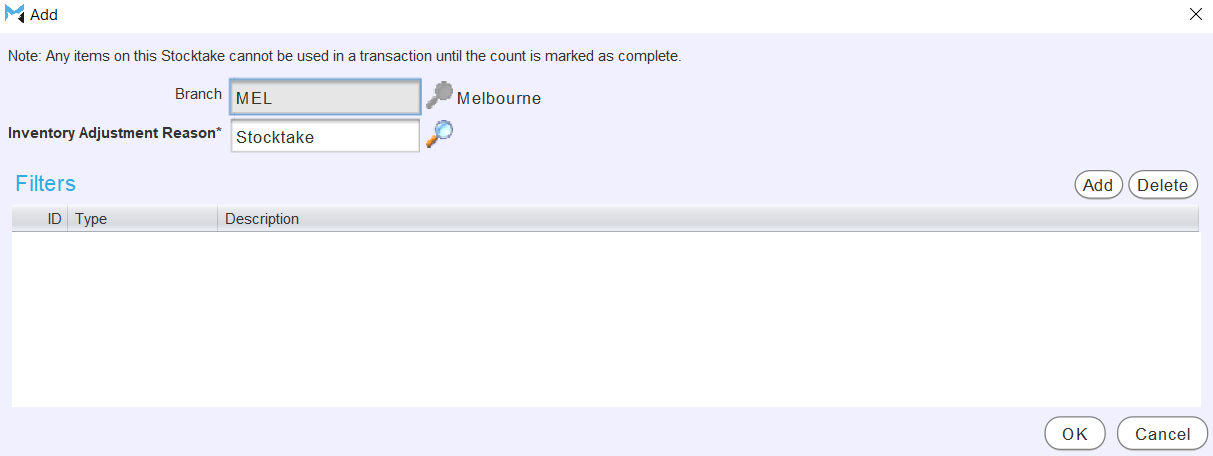
The Inventory Adjustment Reason can be used to select a default reason that will be applied to any changes in item quantities that occur as a result of the stocktake.
Inventory adjustment reasons can also be changed for individual items when conducting the stocktake.
The default for the Inventory Adjustment Reason can be set using the Stocktake.DefaultValue.Reason enterprise setting but can be changed using the picker to the right, if required.
The Filters list at the bottom of the Add window can be used to restrict the Items that appear on the stocktake, based on Item Field, Item Type, Manufacturer or Reporting Group.
To begin the stocktake, click the Ok button at the bottom right of the Add window.
The stocktake window will open on the Details tab, showing information about the stocktake at the top and the list of Items to be counted below.
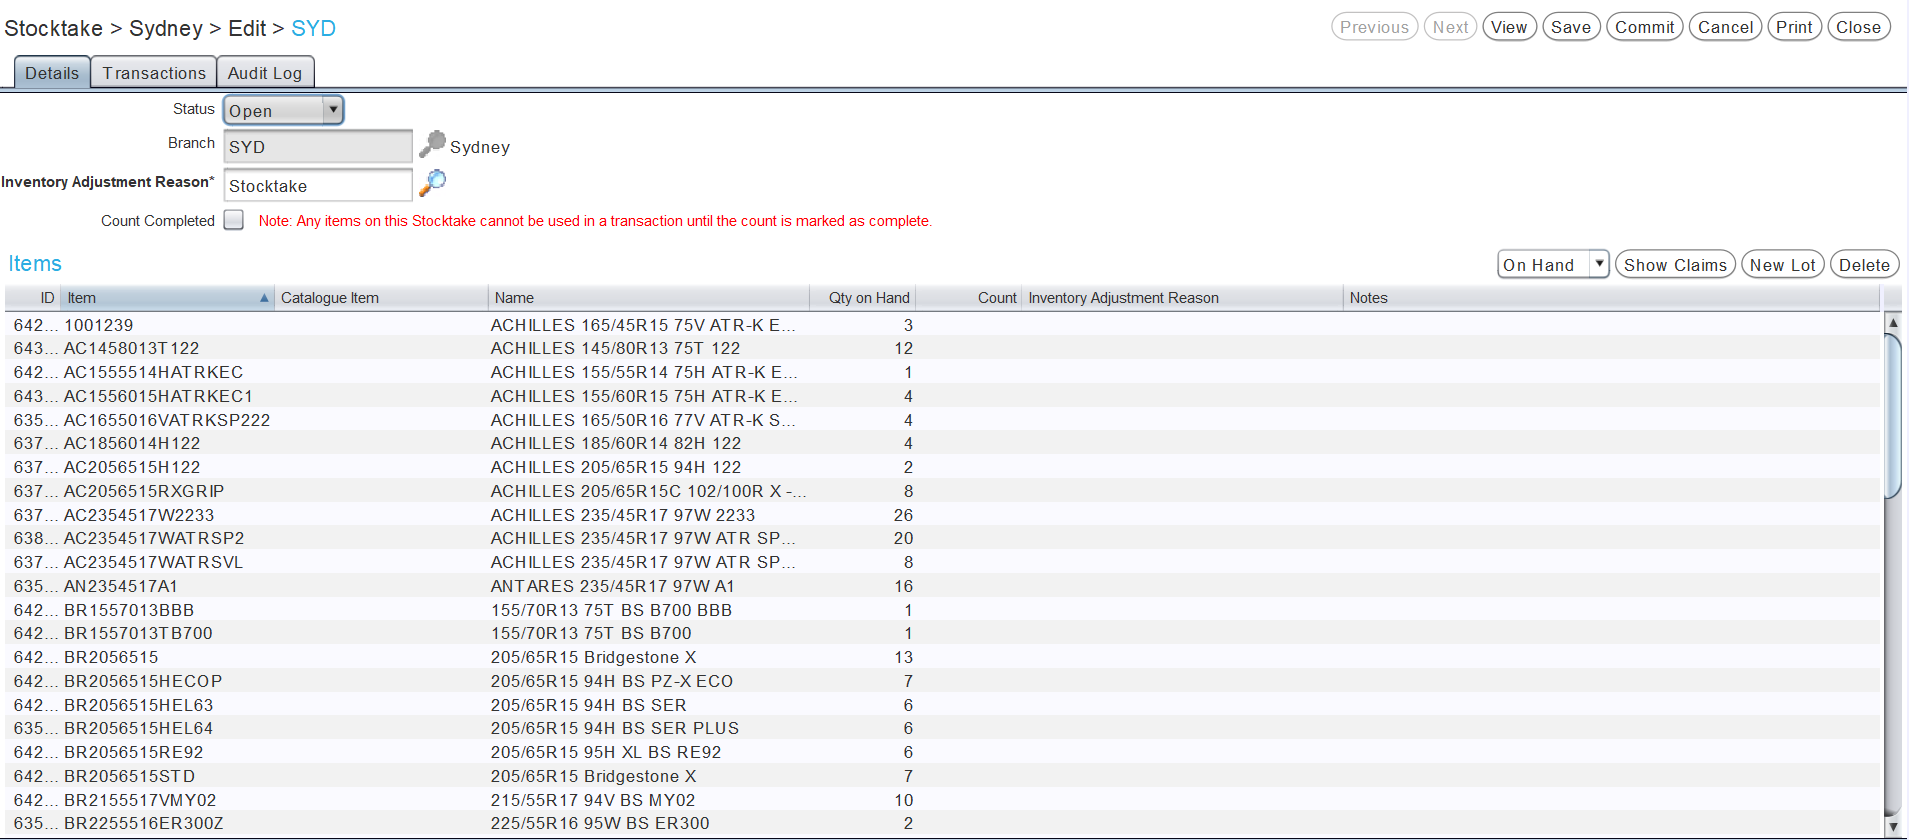
Counts can be entered directly into the Count column of the Items list.

Alternatively, a Stocktake Tally Sheet can be printed out (by clicking on the Print action button to the top-right of the module window), and then the item information entered in once all counts are complete.
Clicking the print action button for a Closed stocktake will generate a Stocktake Variance Report, rather than a Stocktake Tally Sheet.
Transactions cannot be finalised for items on an open stocktake.
To enable the trading of Items listed on the stocktake after the count is complete but while information is still being entered into the Marlin system, tick the Count Completed checkbox below the textboxes at the top of its Details tab.
Adding Item Filters to Stocktakes
Daily Activity > Stocktake > Add
Since large inventories often require stocktakes to be done in batches, the Filters list at the bottom of the stocktake Add window allows the items on the stocktake to be restricted, based on Item Field, Item Type, Manufacturer or Reporting Group.
To add an item filter to a stocktake, click on the Add action button to the top-right of the Filters list.

The Add Filter pop-up window will open.
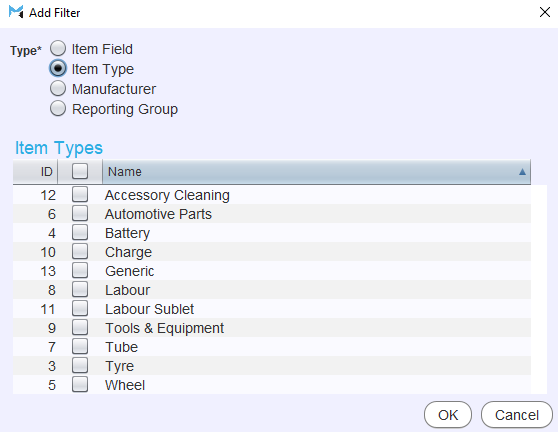
Use the Type toggles at the top to select which filter to apply.
The selection methods shown below will change depending on which type is selected.
Multiple filters can be applied to a single stocktake. However, only Items that fulfil the requirements for all filters will be included.
Once the appropriate filters have been added, click the Ok button at the bottom right of the Add Filter window to return to the stocktake's Add window.
Filters can be deleted from a stocktake by selecting them in the filters list and clicking the Delete action button to the top-right.
Stocktake Tally Sheets
Daily Activity > Stocktake > [Stocktake]
Stocktake Tally Sheets show all of the information and columns contained in a stocktake's Items list and can be generated as PDF, Microsoft Excel or Microsoft Word documents.
They can be printed once the stocktake has been added, or for any open stocktakes by opening them from the Stocktakes Search list and clicking on the Print action button to the top-right of the module window.

The Print pop-up window will open, containing options for configuring the Stocktake Tally Sheet.
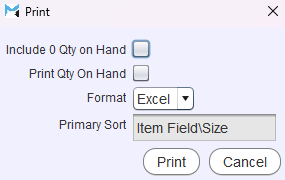
To include Items where no stock on hand is expected on the Stocktake Tally Sheet, tick the Include 0 Qty on Hand checkbox.
Alternatively, to include the expected quantities for Items on the Stocktake Tally Sheet, tick the Print Qty on Hand checkbox.
Use the Format drop-down menu to select the output type for the Stocktake Tally Sheet.
To generate the Stocktake Tally Sheet, click on the Print button at the bottom right of the pop-up window.
The generated document can then be printed and used to record stocktake counts.
The order items appear in on printed tally sheets can be affected by adding additional columns to the stocktake list and clicking on the column heading to sort by it.
For example: to create a stocktake tally sheet that is sorted by size, add an Item Field/Size column to the stocktake, Sort the stocktake item list by the new Size column and then Print.
Conducting Stocktakes
Daily Activity > Stocktake > [Stocktake]
Add a new stocktake, or open an existing one form the stocktake Search list.

The stocktake window will open on the Details tab, showing information about the stocktake at the top and the list of items to be counted below.
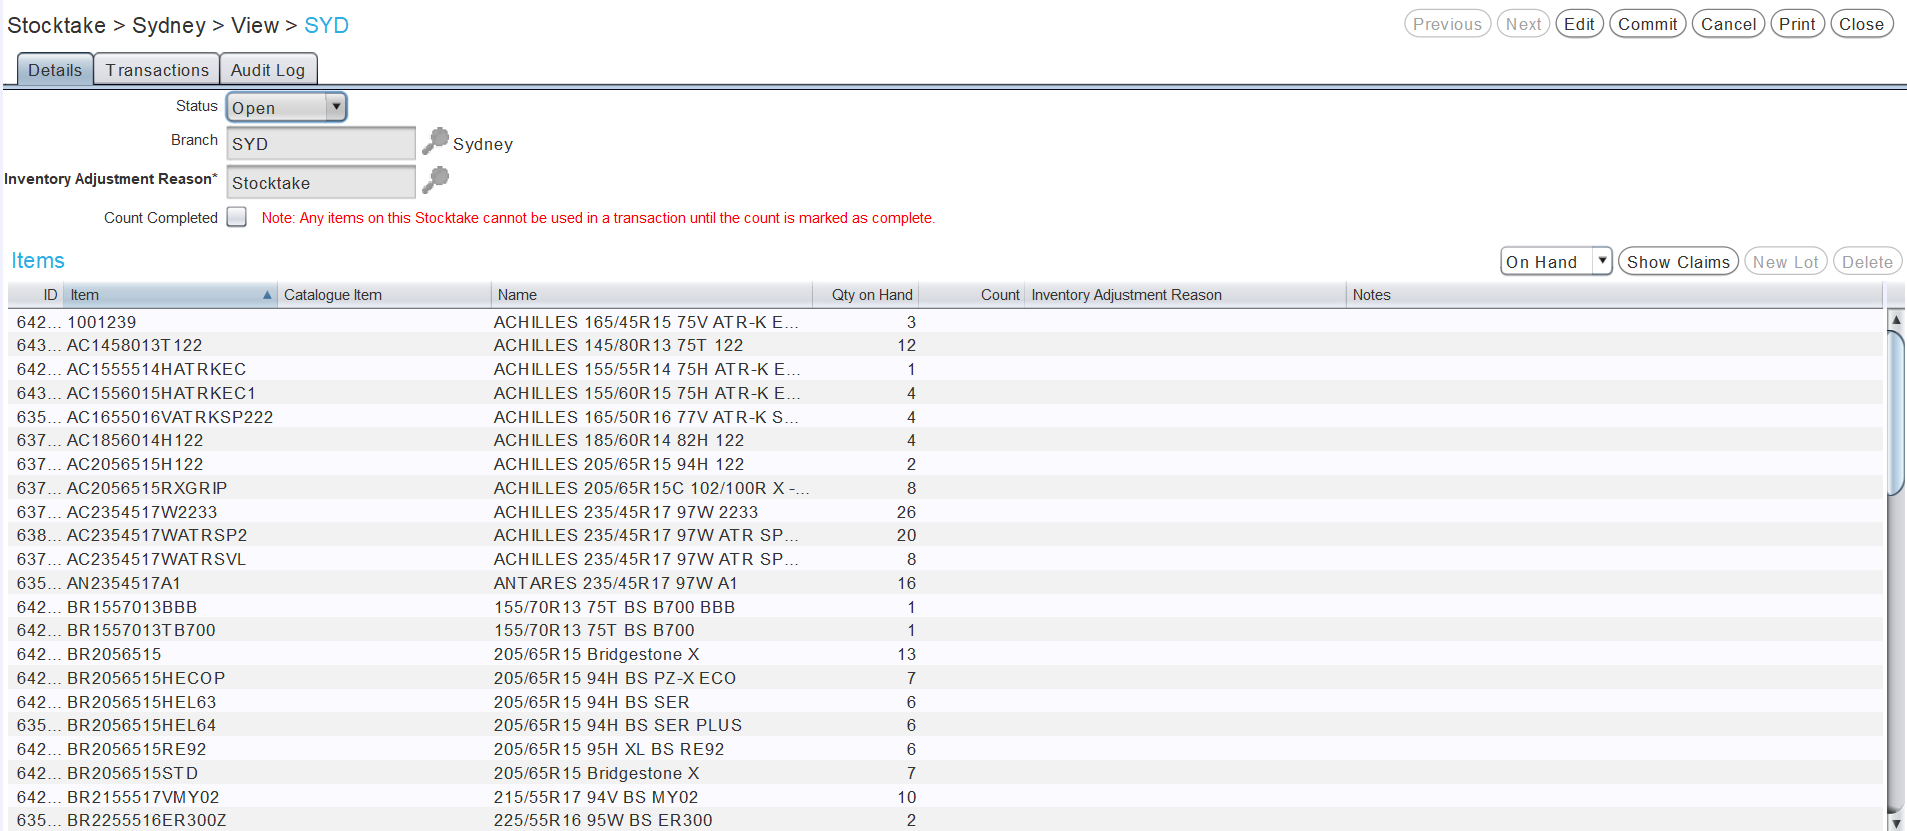
By default, the items list will be filtered to show only items On Hand.
The items list can also be filtered to show All or only Active items, if necessary.
Once the stock has been counted, enter the item quantities in the Count column.
If no count is entered for an item, Marlin will assume that the actual stock matches the recorded Qty on Hand.
Individual Inventory Adjustment Reasons and Notes for each item can also be added by typing in the relevant cell.
Once counts have been entered, setting the items list's filter to Variances will show items with a difference between the recorded Qty on Hand and the actual Count.
Any open warranty claims for a selected item can be viewed by clicking the Show Claims button to the top-right of the items list.
If necessary, new item lots can be added during the stocktake, by clicking the New Lot button to the top-right of the items list.
Items can also be deleted from the stocktake by selecting them in the items list and clicking on the Delete button to the top-right.
To enable the trading of items listed on the stocktake after the count is complete but while information is still being entered into the Marlin system, tick the Count Completed checkbox below the textboxes at the top of the Details tab.
The stocktake can be Saved at any stage by clicking on the Save action button to the top-right of the Stocktake window. Saved Stocktakes remain Open, however, meaning any items listed on them still cannot be traded until the stocktake is committed or the Count Completed checkbox is ticked. Stocktakes with the Count Completed checkbox ticked will still be listed as Open in the Stocktakes Search list.
Committing Stocktakes
Daily Activity > Stocktake > [Stocktake]
Once a stocktake is completed and all necessary adjustments have been made, click on the Commit action button to the top-right of the Stocktake window.

The Commit pop-up window will open, containing options for generating a Stocktake Variance Report.
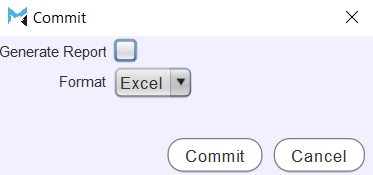
Stocktake Variance Reports show a list of the stocktake's items where the count does not match the recorded Qty on Hand.
To generate a Stocktake Variance Report for the Stocktake, leave the Generate Report checkbox ticked.
The Format drop-down menu can be used to select the output type for the Stocktake Variance Report.
Stocktake Variance Reports for closed stocktakes can be printed later by opening them from the Stocktake Search list and clicking the Print action button to the top-right.
To commit the stocktake and return to the search list, click on the Commit button at the bottom right.
Once committed, the Stocktake's Transactions tab will show the journal entries for inventory adjustments created as a result of the stocktake.
Cancelling Stocktakes
Daily Activity > Stocktake > [Stocktake]
To cancel an open stocktake, open it from the Stocktake's search list and click on the Cancel action button at the top-right of the module window.

The Cancel Stocktake pop-up window will open.

To cancel the stocktake and return to the Stocktake Search list, click the Cancel Stocktake button at the bottom right.
No inventory adjustments will occur based on a cancelled stocktake's counts.
Once cancelled, stocktakes cannot be edited or committed.