Marlin Tyre and Mechanical Workshop Software allows multiple EFT types and terminals to be added for processing EFT payments.
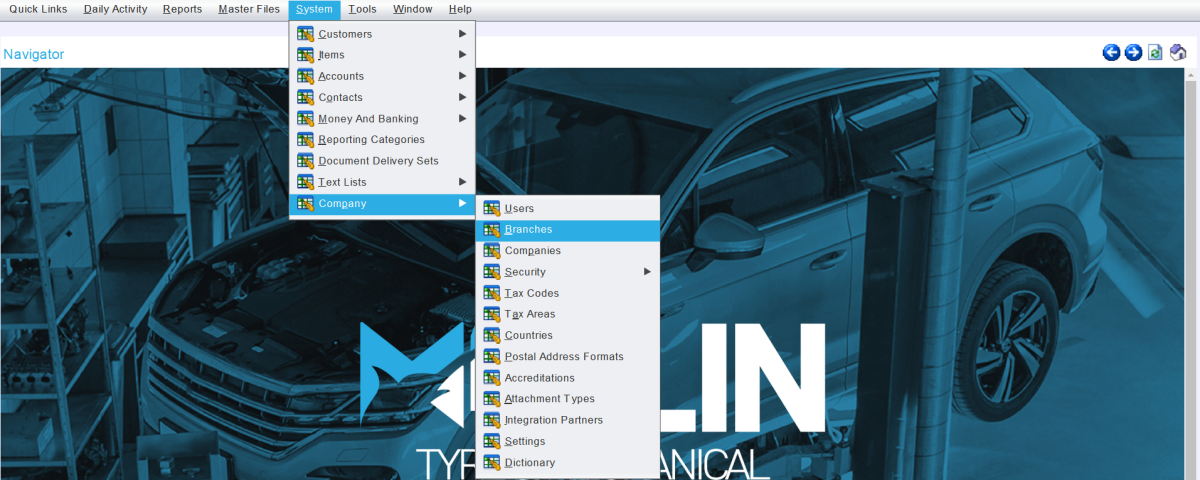
To view and edit EFT terminals, select System > Company > Branches from the menu bar.

The Branches module will open on the Search page, showing a list of active branches within the Marlin system.

Open the branch to configure EFT terminals for in Edit mode.
The branch window will open on the Details tab.
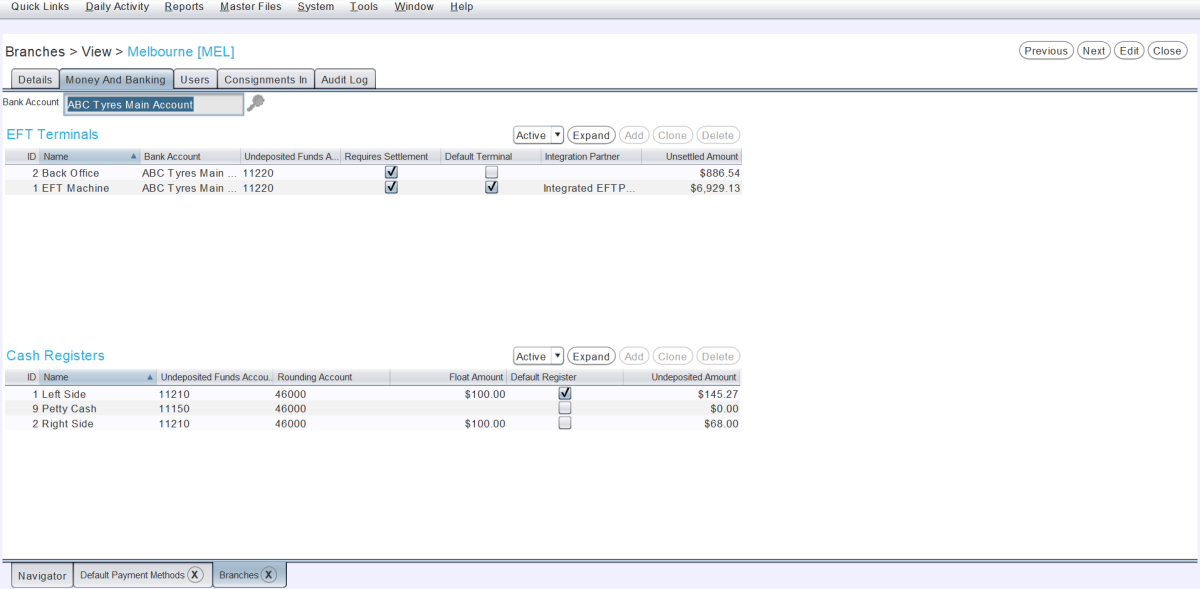
To configure EFT terminal settings, click on the Money and Banking tab at the top.

The Bank Account picker at the top of the Money and Banking tab can be used to set the default account that will be used for bank deposits and will appear on invoice documents if the Print Bank Details setting is enabled.
Whether bank details are printed on invoice documents can be set by selecting System > Company Settings from the menu bar, clicking on the Company Settings tab at the top and locating the CustomerInvoice.PrintBankDetails report setting.
The EFT Terminals list at the top of the Money and Banking tab shows the active EFT terminals that have been configured for the branch.
Adding EFT Terminals
System > Company > Branches > [Branch] > Money and Banking
To the top right of the EFT Terminals list, click the Add action button.

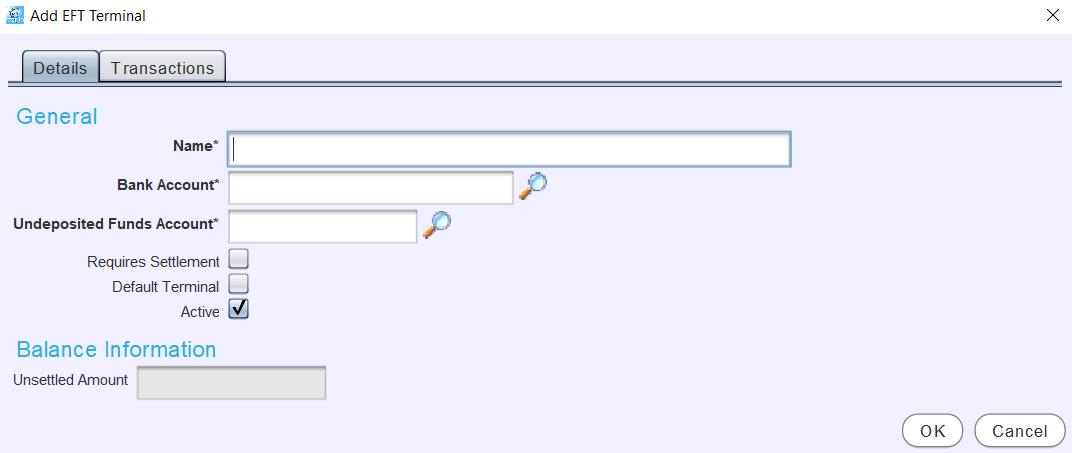
The Add EFT Terminal pop-up window will open, containing a form for adding a new EFT terminal.

In the Name textbox, enter a name for the new EFT terminal (eg. "Left Counter").
In the Bank Account field, use the picker to select the bank account that the EFT terminal amounts will be posted to when settled.
Use the Undeposited Funds Account picker to select an asset GL account to post the EFT terminal's transactions to, prior to being deposited.
The Undeposited Funds Account picker only allows selection of accounts that do not allow sales or purchases.
To require the EFT terminal's balance to be manually settled through the bank deposits module, tick the Requires Settlement checkbox.
If the Requires Settlement checkbox is not ticked, the EFT terminal will not appear in the bank deposits module, and the funds from any transactions will be transferred straight to the associated bank account instead of the undeposited funds account.
To make the EFT terminal the default for the branch's EFT transactions, tick the Default Terminal checkbox.
Only one EFT terminal for each branch can be set as the default. When adding or changing to a new default terminal, the old one will need to be manually disabled, by opening it from the EFT terminals list and unticking the Default Terminal checkbox.
To enable the new EFT terminal within the Marlin system, leave the Active checkbox ticked.
The Balance Information section at the bottom of the Add EFT terminal pop-up window and the Transactions tab show the current balance of the selected EFT terminal, and will be empty for new EFT terminals until they are used.
To add the new EFT terminal and return to the Money and Banking tab, click the Ok button at the bottom right of the pop-up window.
To save the EFT terminal settings and return to the Branches search list,click on the Save action button at the top right of the module window.
EFT Types
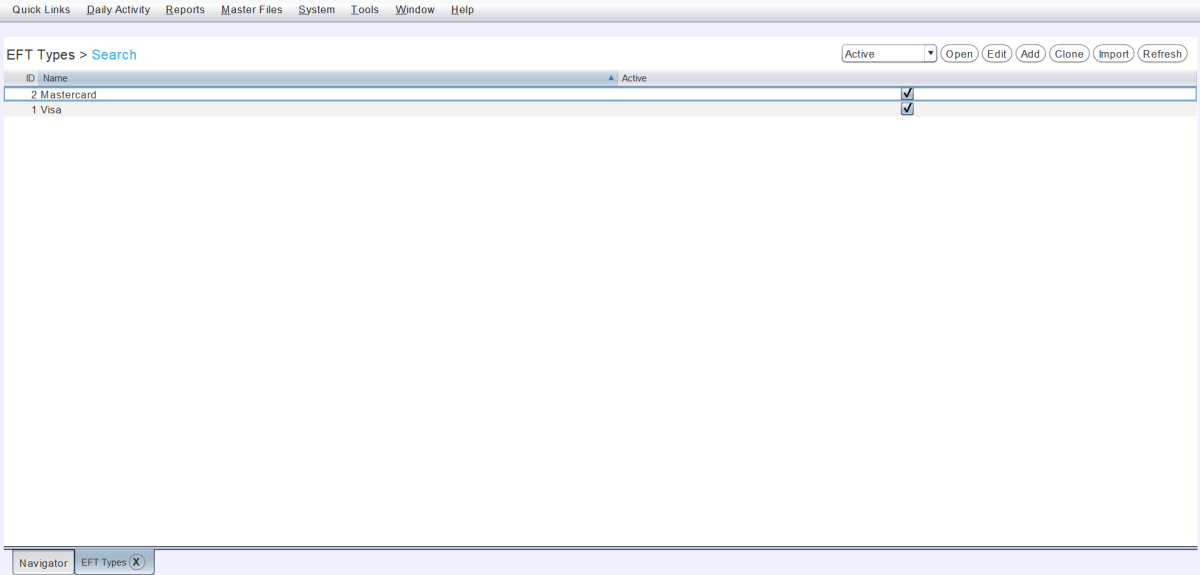
EFT Types can be viewed and edited by selecting System > Money and Banking > EFT Types from the menu bar.

The EFT Types system file will open on the Search page, showing a list of active EFT types within the Marlin system.

To add an EFT type, click on the Add action button to the top right of the EFT Search list.

The EFT Type window will open on the Details tab, which contains a form for adding a new EFT Type.
In the Name textbox, enter a name for the new EFT type.
Leave the Active checkbox ticked to enable the new EFT Type within the Marlin system.
To save the new EFT type and return to the Search list, click on the Save action button at the top right of the module window.
Surcharges
Surcharges and Merchant Fees can be set up for different EFT types, using the EFT Types list at the bottom of the relevant Bank Account master file's Detials tab.
Restricted EFT
The Bank Accounts master file can also be used to restrict EFT types from being used with particular terminals, if desired.
ADDING BANK EFT TERMINALS TO BANK ACCOUNTS?