Marlin Tyre and Mechanical Workshop Software allows credit providers to be set up as their own payment methods for customers or as selectable EFT types.
To view and edit credit providers, select Master Files > Accounts > Credit Providers from the menu bar.

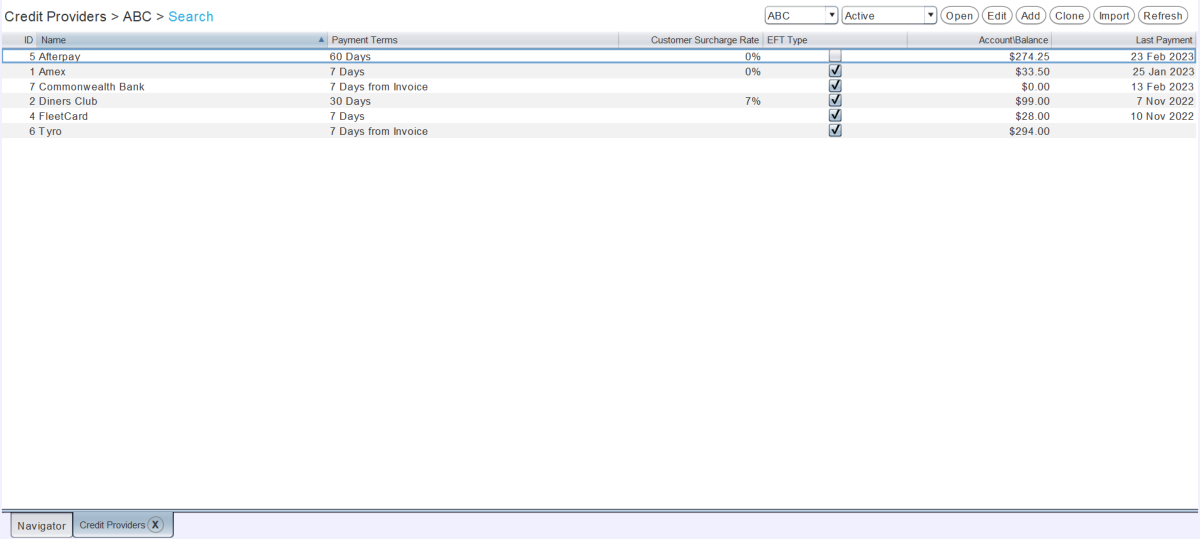
The Credit Providers master file will open on the Search window, showing a list of active credit providers.

Once added, credit providers will be available to all companies within the Marlin system. However, their balances and accounting configurations are specific to each company. The company of the Credit Providers master file can be changed using the filter to the top right of the search list.
Adding Credit Providers
Master Files > Accounts > Credit Providers
To the top right of the Credit Providers Search list, click on the Add action button.
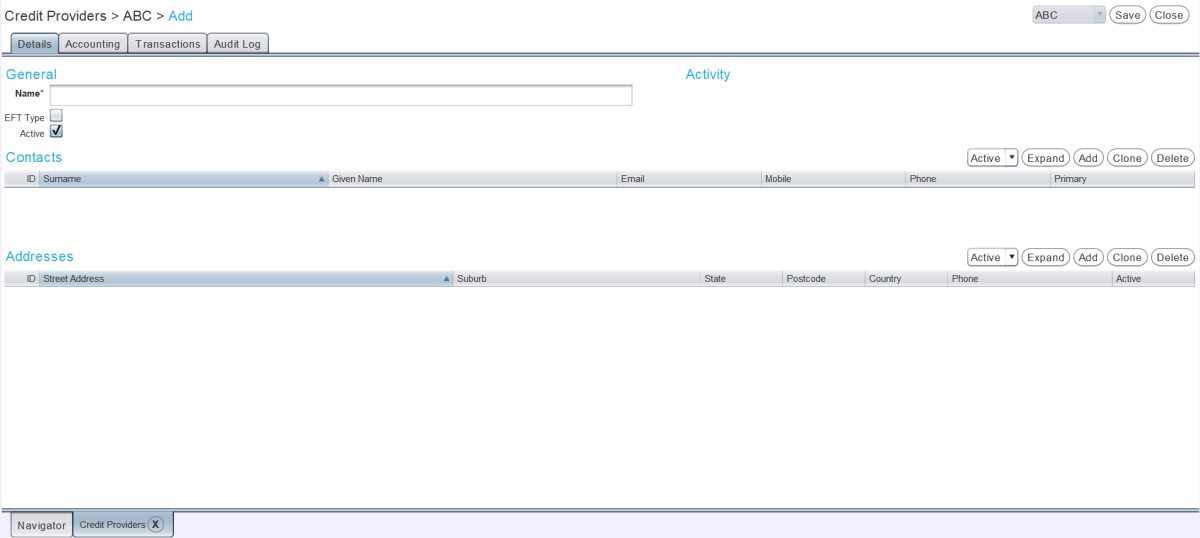
The Credit Provider window will open on the Details tab, containing a form for creating a new credit provider.

In the General section at the top, in the Name textbox, enter the name of the new credit provider.
To make the credit provider available as an EFT payment type, tick the EFT Type checkbox below.
Credit providers can appear as either EFT or Credit Provider payment types, not both.
To enable the new credit provider within the Marlin system, leave the Active checkbox ticked.
Contact details for the Credit Provider can then be added using the Contacts and Addresses lists below.
Credit providers cannot be used unless they have an associated account to post their balance to, which can be added by clicking on the Accounting tab at the top.
To save the new credit provider and return to the Credit Providers Search list, click on the Save action button at the top right of the module window.
Adding Credit Provider Contacts
Master Files > Accounts > Credit Providers > Credit Provider
Contacts can be added to a credit provider by clicking the Add action button to the top right of the Contacts list in the middle of the credit provider's details tab.

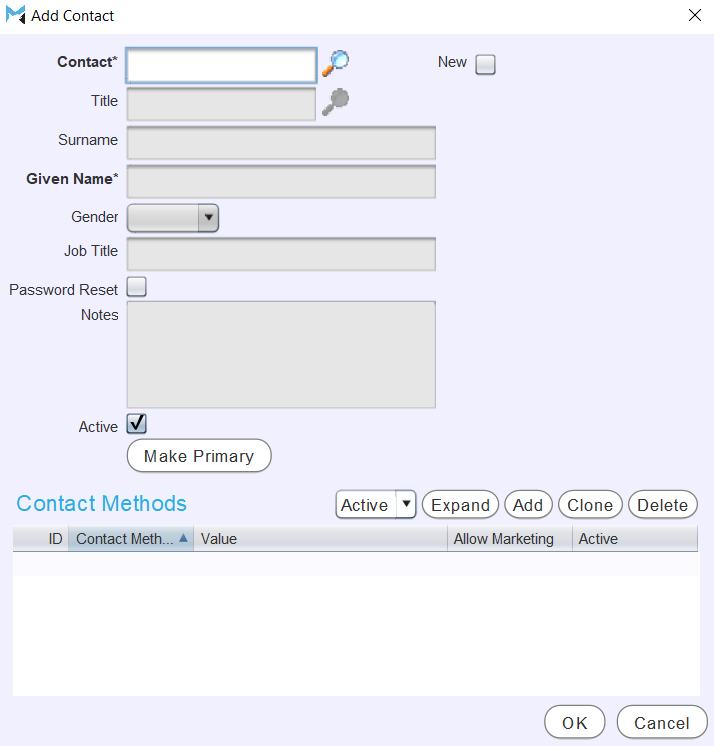
The Add Contact pop-up window will open, containing a form for adding a new contact.

To add an existing contact within the Marlin system, use the picker to the right of the Contact textbox.
To add details for a new contact, tick the New checkbox to the top right of the Add Contact window, which will allow the contact detail fields below to be edited.
New contact details can also be added by opening the Contact picklist and pressing F4 on the keyboard. The Contacts master file will open in a pop-up window, and a new contact can be added as usual by clicking the Add button to the top right.
To enable the contact within the Marlin system, leave the Active checkbox ticked.
To make the contact the main contact for the credit provider, click on the Make Primary button.
Contact methods can be added using the Contact Methods list at the bottom.
To add the contact to the credit provider and return to the details tab, click the Ok button at the bottom right of the pop-up window.
Adding Credit Provider Addresses
Master Files > Accounts > Credit Providers > Credit Provider
An address and phone number for the credit provider itself can be added by clicking on the Add action button to the top right of the Addresses list at the bottom of the credit provider's details tab.

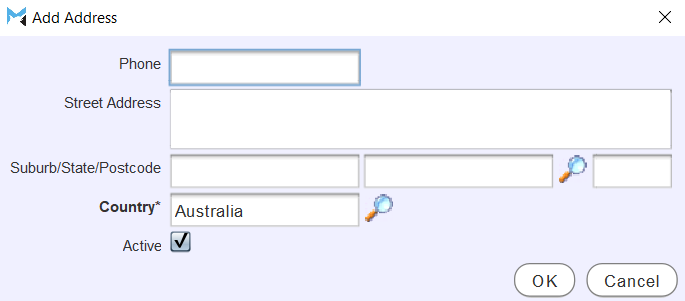
The Add Address pop-up window will open, containing a form for adding a new address to the credit provider.

Enter the credit provider's address and phone number as appropriate.
To enable the address for the credit provider, leave the Active checkbox ticked.
To add the address to the credit provider and return to the details tab, click the Ok button at the bottom right of the pop-up window.
Adding Credit Provider Accounts
Master Files > Accounts > Credit Providers > Credit Provider
Credit providers cannot be used unless they have an associated account to post their balance to.
To add an account to a credit provider, open it and click on the Accounting tab at the top.

If the credit provider has no account, then the accounting tab will only show the Create Account button.
Clicking the Create Account button will show a form for adding a new account.

At the top, use the Payment Terms picker to select the credit provider's payment terms.
Use the Merchant Fee Account picker to select the expense account any merchant fees charged by the credit provider will be posted to.
If surcharges are enabled, there will be a Customer Surcharge Rate textbox, where a fee for using the credit provider can be entered as a percentage.
To charge a customer 1% of the purchase price when using the credit provider, enter "1" in the Customer Surcharge Rate textbox.
If a surcharge rate is entered, use the Surcharge Account picker to select the revenue account the surcharge will be posted to.
Only GL accounts that do not allow sales or purchases can be selected as merchant fee and surcharge accounts.
Before saving, account details can be removed by clicking the Remove Account button at the top of the Accounting tab (where the Create Account button used to be).
Once saved, account details cannot be removed from a credit provider, but they can be edited.