Marlin Tyre and Mechanical Workshop Software's Bank Deposits module helps record, adjust and process payments at the end of each day.
Bank Deposits process EFT Settlements and records physical deposits of Cash, Cheques and Manual Credit Card Vouchers.
Bank deposits can also be used to adjust the recorded payment methods for completed transactions.
Payments made by credit providers or bank transfers are processed automatically and do not need to be manually deposited, but can still be viewed and adjusted using the Bank Deposits module.
To view or edit Bank Deposits, select Daily Activity > Bank Deposits from the Menu Bar.

The Bank Deposits module will open on the Search window, showing a list of previous bank deposits for the branch the user is logged into.
To access bank deposits for a different branch, the user must log out of Marlin and then log back into the required branch.
The list can be changed to show only bank deposits for specific bank accounts using the filter to the top-right.
Adding Bank Deposits
Daily Activity > Bank Deposits
To begin a new bank deposit or edit payment methods of undeposited transactions, click on the Add action button to the top-right of the Bank Deposits Search list.

The Bank Deposit window will open on the Summary tab, showing lists of Money to Be Deposited, EFT to be Settled, Payments by Credit Provider for This Day and Payments by Bank Transfer for This Day.
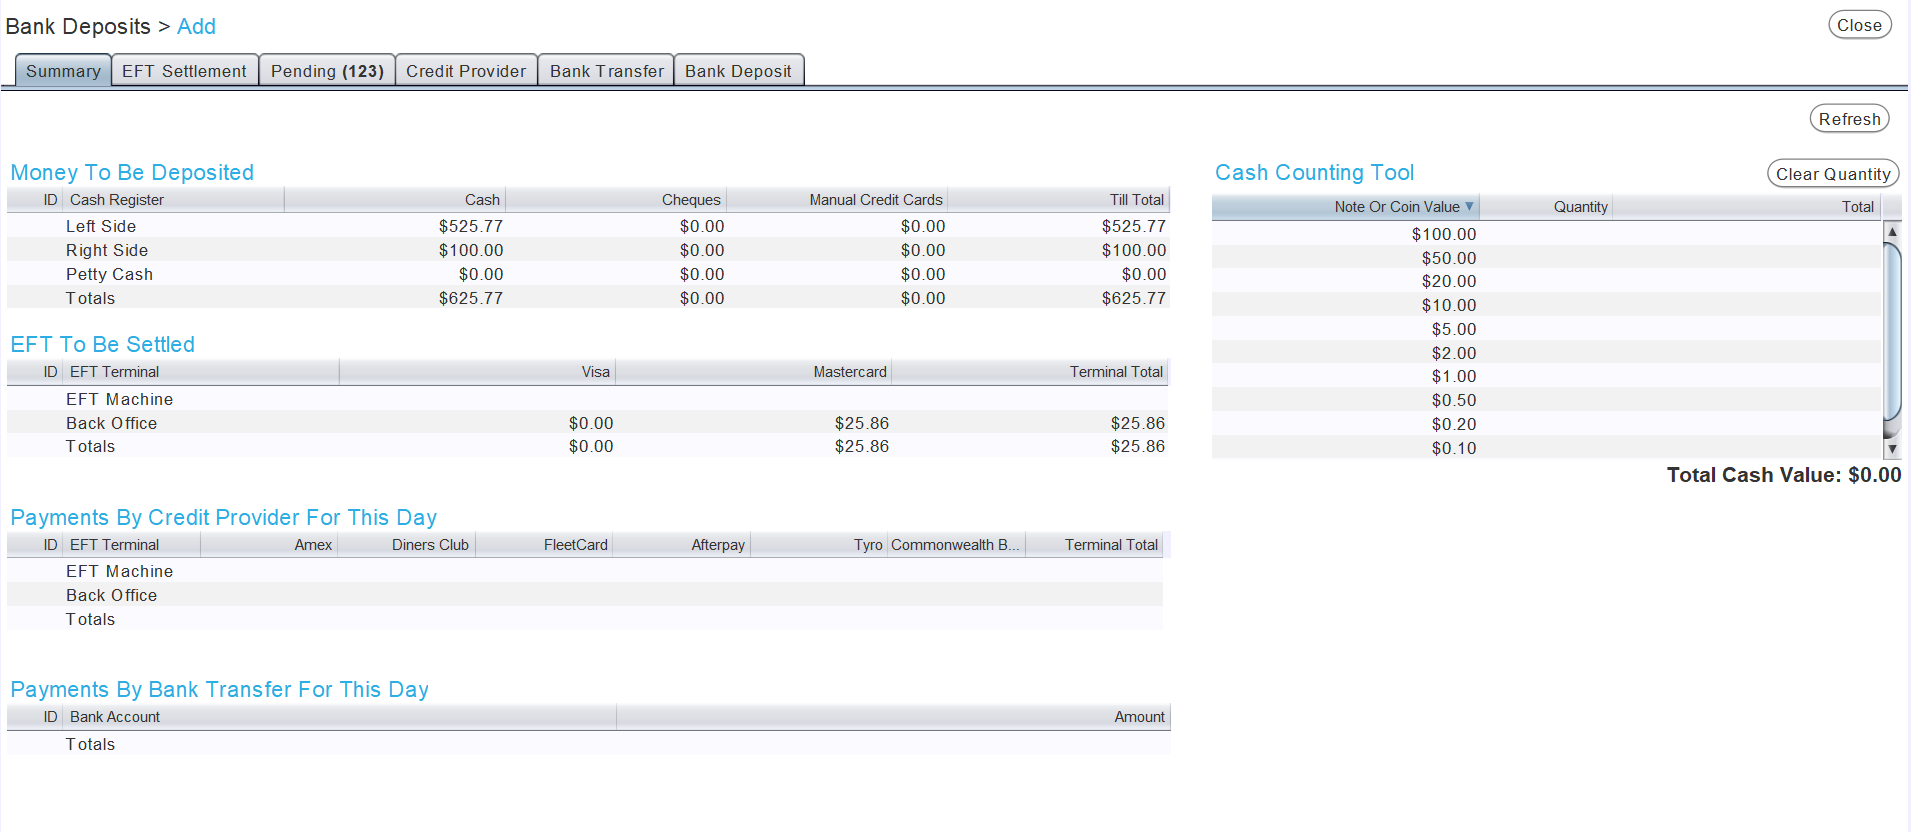
There is also a Cash Counting Tool on the right, to help with counting cash registers.
The Summary tab is for informational purposes only and its lists cannot be edited.
Adjustments can be made to payments made by EFT, Credit Provider, Bank Transfer, Cash, Cheque or Manual Credit Card Voucher by clicking on the relevant tabs at the top of the Bank Deposit window.
Adjusting Transactions
Daily Activity > Bank Deposits > Add
Adjustments can be made to undeposited payments by clicking on the relevant tabs at the top of the Bank Deposit window.

Each tab shows a list or lists of transactions for the relevant transaction type.
Cash payments cannot be adjusted using this method and must first be added to another transaction type list before they can be adjusted.
From the appropriate list, select the transaction to adjust.
To the top-right of the list, click on the Adjust action button.

The Adjust Payment Methods pop-up window will open, showing a summary of the transaction, the payment methods that were originally recorded for it and options for adjusting them.
To adjust the payment methods for the transaction, enter the new payment methods in the New Payment Methods list at the bottom.
If a transaction was originally recorded as $100 paid by EFT but the customer actually made a split payment of $60 by EFT and $40 by cash, enter $60 in the Amount column of the relevant EFT Terminal and $40 in the Amount column of the relevant cash register in the New Payment Methods List.
If a transaction was originally recorded as $100 paid by EFT but forgot to record they were also given $50 cash out, enter $100 in the Amount column of the relevant EFT Terminal and $50 in its Cash Out column.
Additional payment methods can be added to the New Payment Methods list by clicking on the Add button to the top-right and using the drop-down menu that appears in the Method column.
To commit the adjustment click on the Adjust button at the bottom right of the Adjust Payment Methods window.
A pop-up window will open, asking to confirm the adjustment.
To confirm the adjustment and return to the Bank Deposit window, click on the Yes button at the bottom right.
The new payment(s) will appear at the bottom of the relevant list(s).
Adjusting Cash Payments
Daily Activity > Bank Deposits > Add
Although they cannot be adjusted directly, cash transactions can be added to other payment lists and adjusted from there.
To the top-right of the relevant list to, click on the Add action button.

The Select Cash Transaction to Adjust window will open, showing a list of cash transactions that can be added to the transactions list.
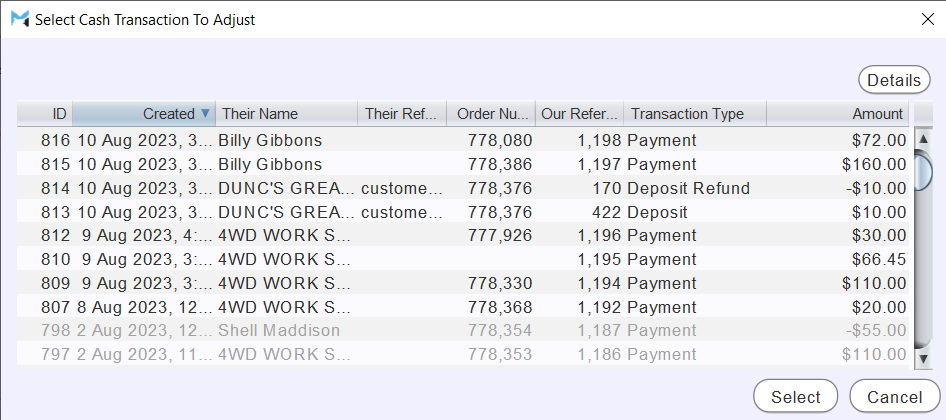
Transactions that have already been deposited will be greyed out.
Select the cash transaction to adjust and click on the Select button to the bottom right.
The Adjust Payment Methods pop-up window will open, and can be used to adjust the payment as usual.
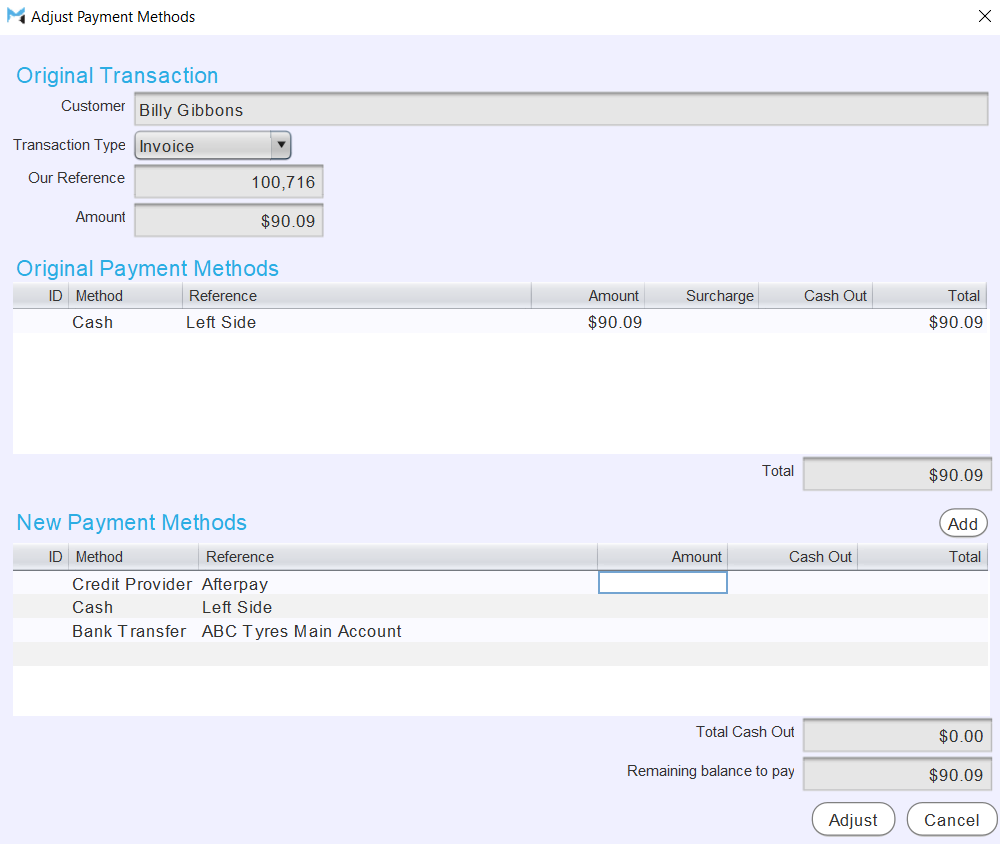
To confirm the adjustment and return to the Bank Deposit window, click on the Yes button at the bottom right.
The new payments will appear at the bottom of the relevant lists.
EFT Settlements
Daily Activity > Bank Deposits > Add
At the top of the Bank Deposit window, click on the EFT Settlement tab.
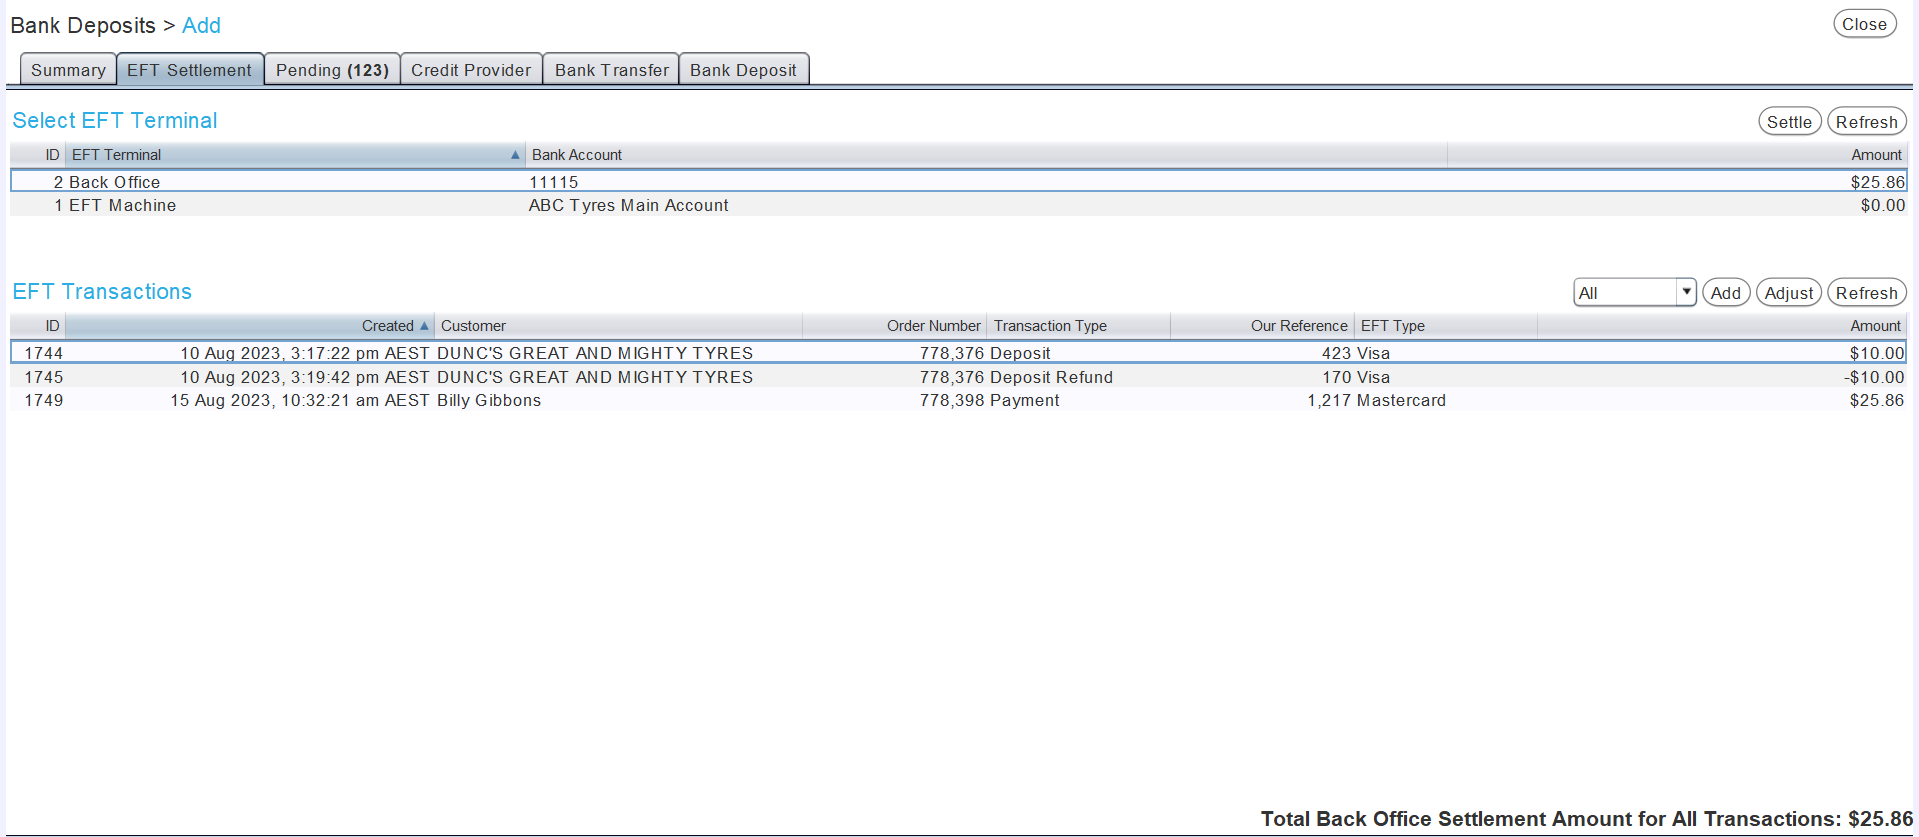
The EFT Settlement tab will open, showing a list of EFT terminals for the current branch, and a list of their transactions.
Selecting an EFT terminal from the Select EFT Terminal list at the top will show its individual transactions since the last settlement in the EFT Transactions list at the bottom.
Payments made by EFT can be adjusted as usual.
To settle a terminal, select it in the Select EFT Terminal list and click on the Settle action button to the top-right.

The Settle EFT Transactions pop-up window will open, asking to confirm the settlement.

To confirm the EFT settlement and return to the Bank Deposits window, click the Yes button at the bottom right.
Once settled, the EFT terminal's balance will be cleared in Marlin and moved to the associated bank account.
An entry for the settlement will also be added to the account's Bank Reconciliation list.
Payments Made by Credit Providers
Daily Activity > Bank Deposits > Add
To view and adjust payments made by credit providers, click on the Credit Provider tab at the top of the Bank Deposit Add window.
The Credit Provider tab shows a list of Payments Made by Credit Providers for the selected day.
Payments made by specific Credit Providers can be shown using a filter to the top-right of the list.
Payments made by Credit Providers for different days can be shown using the Accounting Date calendar on the left.
Payments made by credit providers can be adjusted as usual.
Payments Made by Bank Transfer
Daily Activity > Bank Deposits > Add
To view and adjust payments made by bank transfer, click on the Bank Transfer tab at the top of the Bank Deposit Add window.

The Bank Transfer tab shows a list of Payments Made by Bank Transfer for the selected day.
Payments made by bank transfer to specific accounts can be shown using a filter to the top-right of the list.
Payments made by bank transfer for different days can be shown using the Accounting Date calendar on the left.
Payments made by bank transfer can be adjusted as usual.
Cash Received
Daily Activity > Bank Deposits > Add
To view and adjust payments made by cash, click on the Bank Deposit tab at the top of the Bank Deposit Add window.
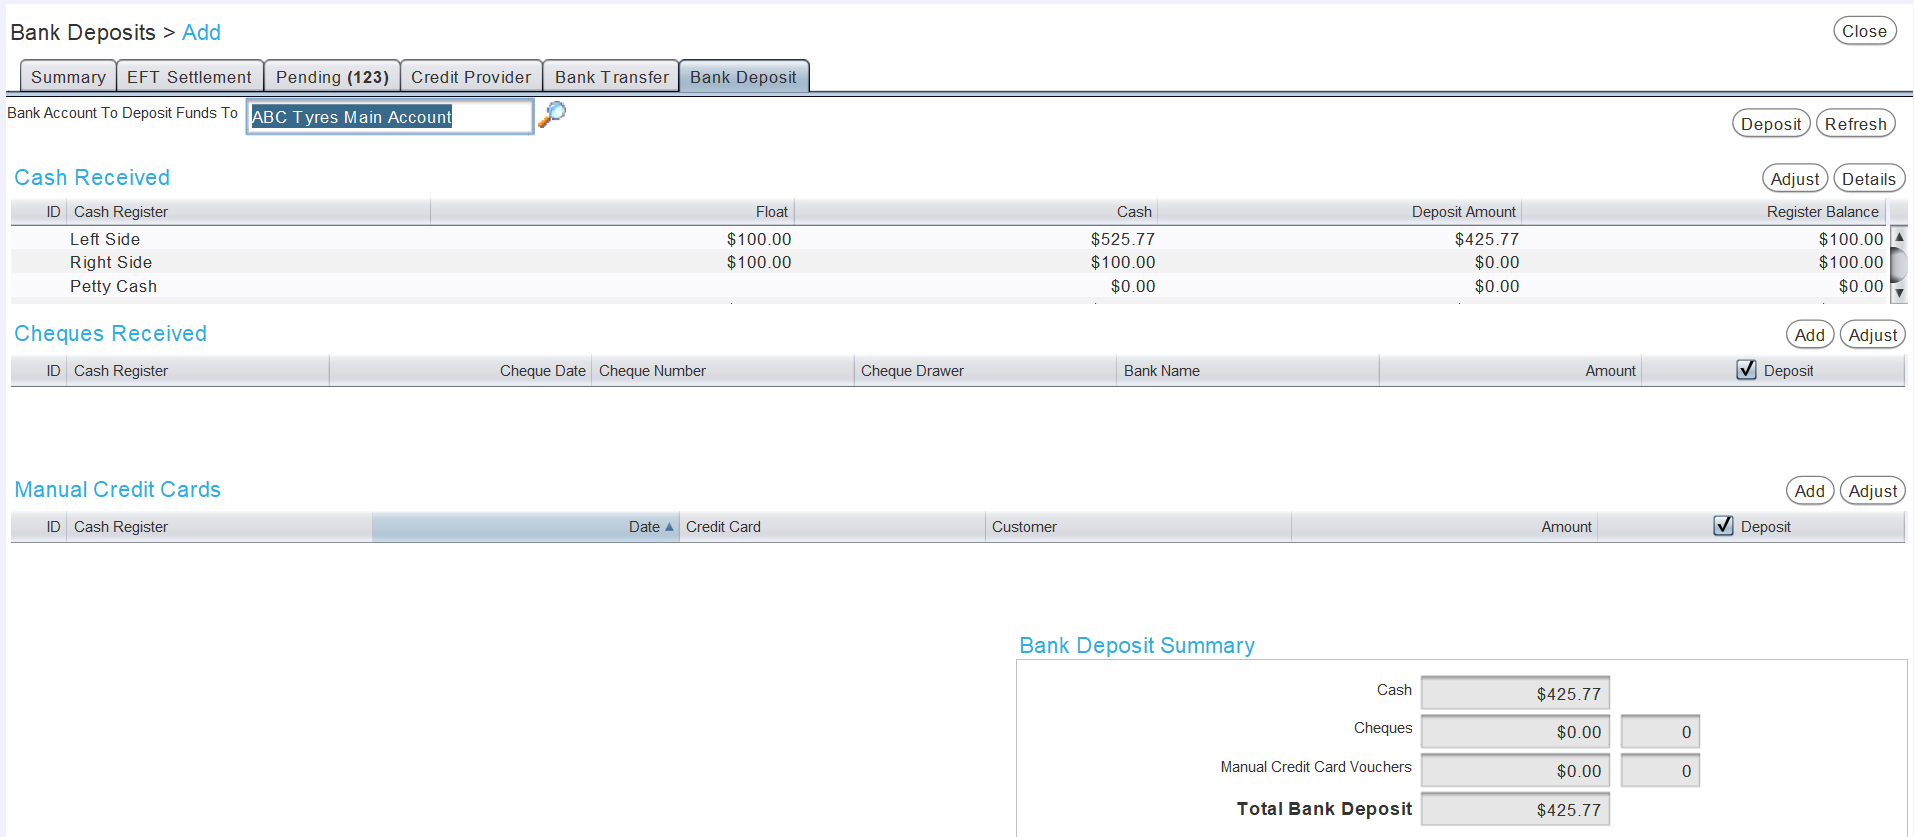
At the top of the Bank Deposit tab is a list of Cash Received awaiting deposit.

The Float column shows the float for each cash register.
Cash register floats are set as part of a branch's money and banking settings, which can be accessed by selecting System > Company > Branches from the menu bar, opening the relevant branch from the list and clicking on the Money and Banking tab at the top.
The Cash column shows the recorded amount of cash for each cash register.
The Deposit Amount column shows the amount of cash from the cash register to be deposited.
The Deposit Amount is first calculated as the total cash in the cash register minus its float, but can be manually edited.
The Register Balance shows the remaining cash in the cash register once the Deposit Amount has been deposited.
The Cash Counting Tool in the Summary tab of the Bank Deposit window can be used to help count cash registers.
Adjusting Cash Received
Daily Activity > Bank Deposits > Add
If the balance in a cash register differs from the recorded cash balance, it can be changed by clicking the Adjust button to the top-right of the Cash Received list.

The Adjust Cash Amount pop-up window will open, containing a list for adjusting cash register amounts.

In the Adjustment column, enter the amount to adjust the cash register count by.
Adjustments can be positive or negative values and can be entered for multiple cash registers.
To confirm the adjustment, click on the Adjust button at the bottom right of the Adjust Cash Amount window.
Another pop-up window will open, asking to confirm the adjustment.
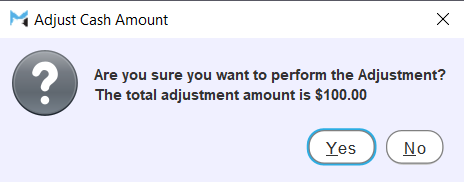
To confirm the adjustment and return to the Bank Deposit tab, click the Yes button at the bottom right.
Once the adjustment is confirmed, a journal entry will automatically be posted to the cash register's Undeposited Funds GL account.
The overall variance will be posted to the Cash Variance GL account.
Cash register 1 is up $50 and cash register 2 is down $70 In the Adjustment column for cash register 1, enter "50". In the adjustment column for cash register 2, enter "-70". The adjusted cash amounts for each cash register will be automatically updated and an overall variance of -$20 will be posted to the Cash Variance GL account, once the adjustment is confirmed.
Cash Received Details
A transaction history for a cash register can be shown by selecting it in the Cash Received list and clicking the Details button to the top-right.

The Details pop-up window will open, showing the cash register's transaction history.
Greyed-out payments have already been deposited.
Cheque Payments
Daily Activity > Bank Deposits > Add
To view and adjust cheque payments, click on the Bank Deposit tab at the top of the Bank Deposit Add window.

Cheque payments can be adjusted as usual, using the Cheques Received list in the middle.

To exclude individual cheques from the deposit, untick the relevant checkbox in the Deposit column.
To exclude all cheques from the deposit, untick the checkbox in the heading of the Deposit column.
Manual Credit Card Payments
Daily Activity > Bank Deposits > Add
To view and adjust manual credit card payments, click on the Bank Deposit tab at the top of the Bank Deposit Add window.

Manual credit card payments can be adjusted as usual., using the Credit Card Payments list at the bottom.

To exclude individual manual credit card payments from the deposit, untick the relevant checkbox in the Deposit column.
To exclude all manual credit card payments from the deposit, untick the checkbox in the heading of the Deposit column.
Recording Bank Deposits
Daily Activity > Bank Deposits > Add > [Bank Deposit]
Once any necessary adjustments have been made and all cash, cheque and manual credit card amounts are ready to be taken to the bank, the deposit needs to be recorded using the Bank Deposit tab of the Bank Deposit window.

At the top-left of the Bank Deposit Tab, use the Bank Account To Deposit Funds To picker to select the bank account the deposit will be made to.
The default Bank Account To Deposit Funds To picker is set by the Bank Account picker at the top-left of the branche's Money and Banking settings tab, which can be accessed by selecting System > Company > Branches from the menu bar, opening the relevant branch from the list and clicking on the Money and Banking tab at the top.
At the bottom right of the Bank Deposit tab is the Bank Deposit Summary box, showing the total value of cash, cheques and manual credit card vouchers to be deposited.

The Bank Deposit Summary includes the cash amounts that have been entered in the Deposit Amount column and any cheque or manual credit card amounts whose deposit checkboxes are ticked.
At the bottom of the Bank Deposit Summary box is the Total Bank Deposit amount, which is what will be deposited.
To record the deposit, click the Deposit button in the top-right of the Bank Deposit tab.

The Bank Deposit pop-up window will open, asking to confirm the deposit.
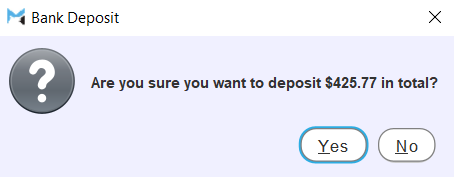
To confirm the deposit, click the Yes button at the bottom right of the pop-up window.
A journal entry will automatically be created to move the deposited funds from the Undeposited Funds GL account to the bank account the deposit was made to.
An entry for the deposit will also be added to the account's Bank Reconciliation list.
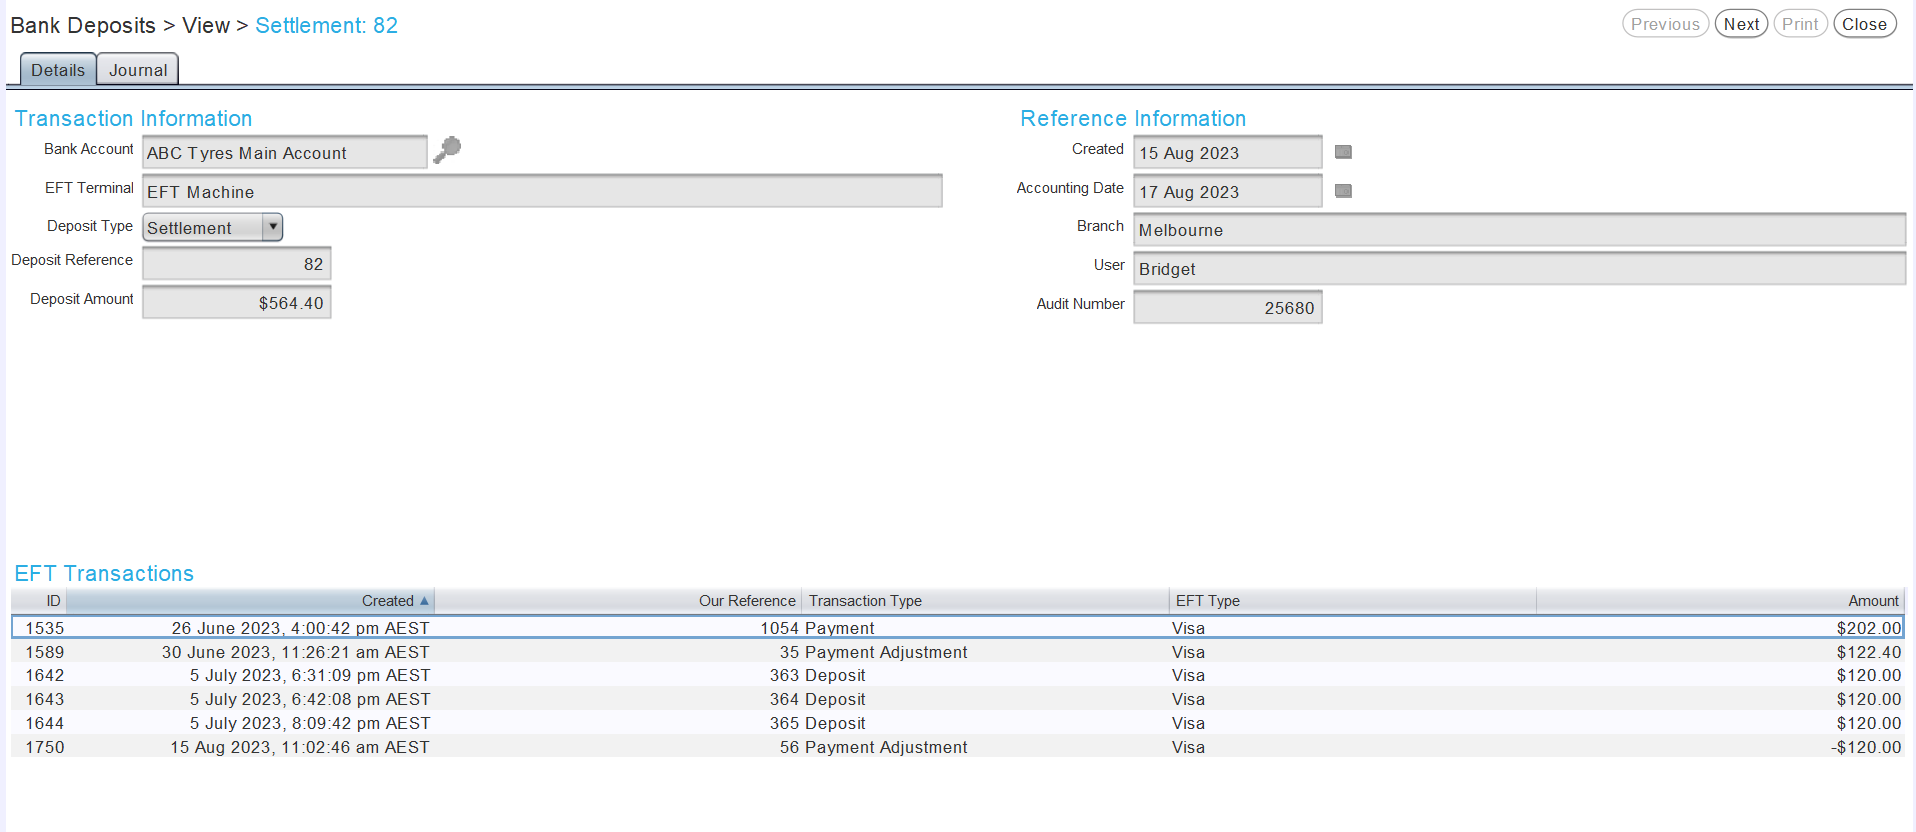
A Bank Deposit document will be generated, showing the details of the deposit.
The cash, cheque and credit card amounts in the Bank Deposit tab will be reduced by the deposited amounts.
To exit the Bank Deposit Add window and return to the Bank Deposits Search list, click on the Close action button to the top-right.

Details of recorded bank deposits and relevant Journal entries can be viewed by opening them from the Bank deposits Search list.
The Cash Counting Tool
Daily Activity > Bank Deposits > Add > [Bank Deposit]
On the right of the Bank Deposit Summary tab is a Cash Counting Tool, which can be used to assist with counting the cash registers.
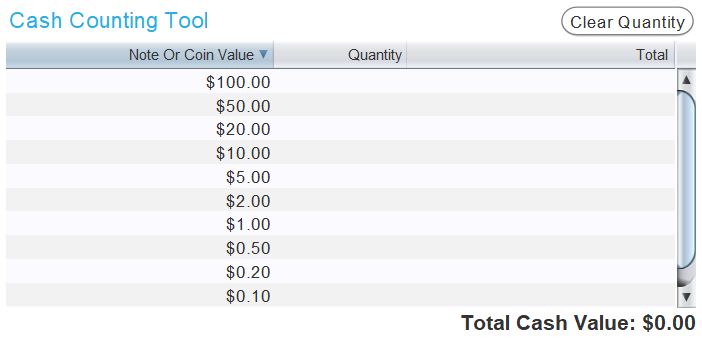
Entering Quantities for the denominations will calculate their total amounts and update the Total Cash Value shown at the bottom right.
The Note Or Coin Values can be configured by selecting System > Money and Banking > Currency Denominations from the Menu Bar.
Cash Counting Tool amounts are for informational purposes only and are not recorded anywhere else in Marlin.
Adding and Editing Currency Denominations
The currency denominations used in the Cash Counting Tool can be viewed and edited by selecting System > Money and Banking > Currency Denominations from the menu bar.

The Currency Denominations module will open on the Search page, showing a list of active currency denominations.
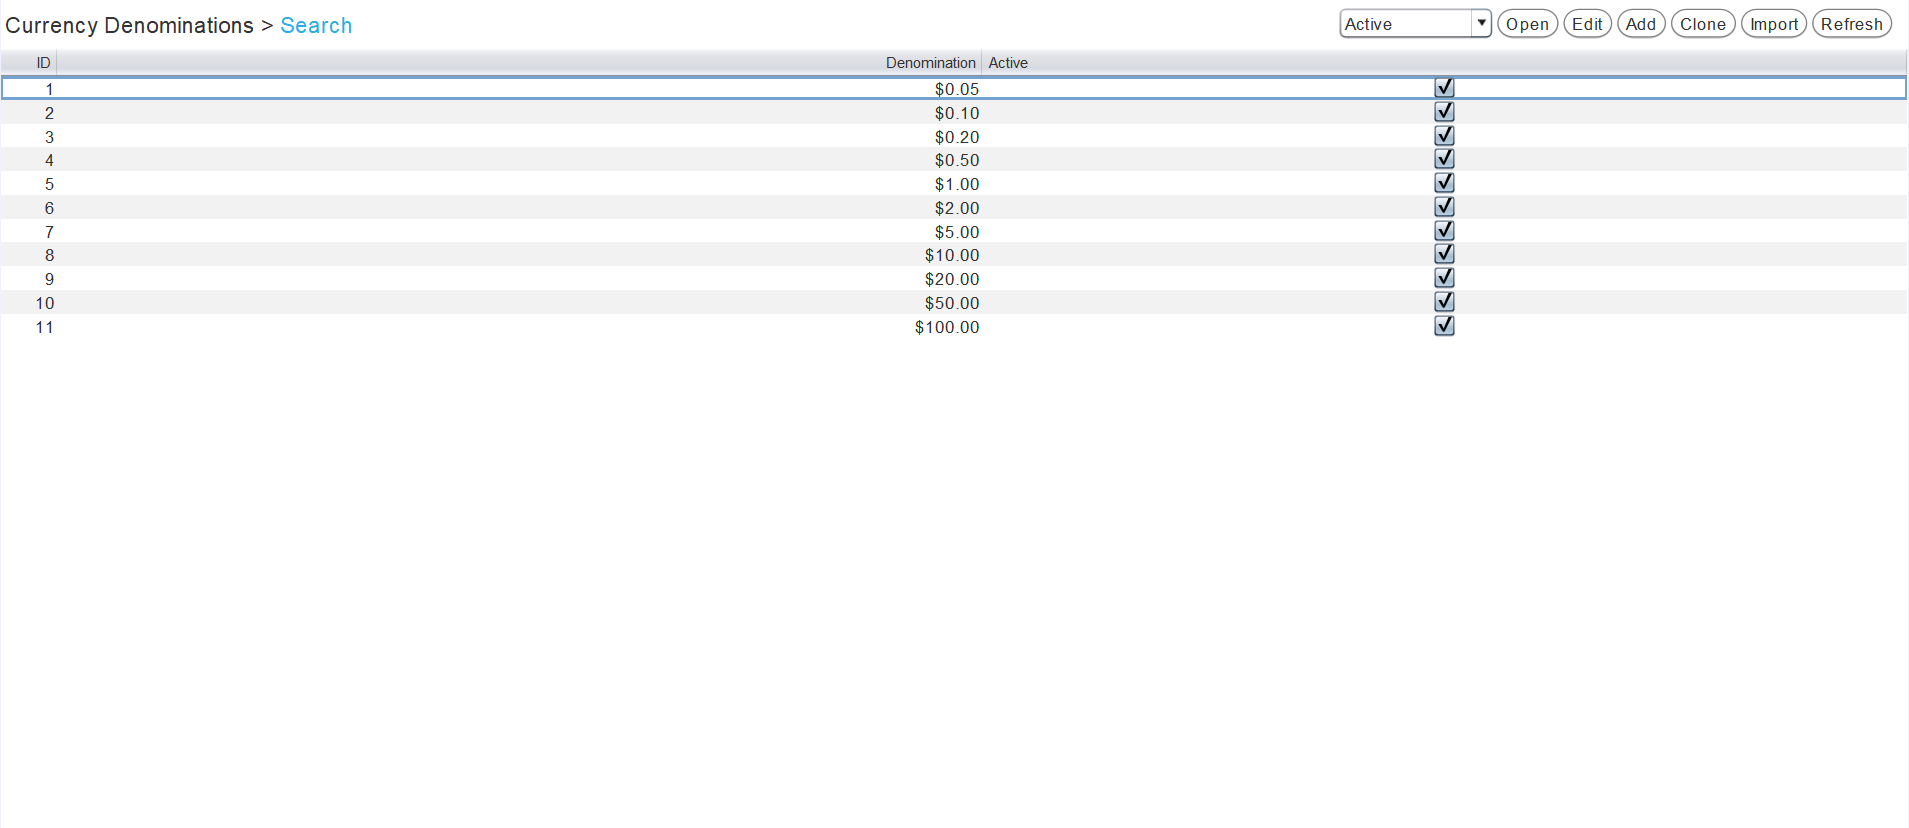
To add a new currency denomination, click on the Add action button at the top-right of the module window.

The Currency Denomination window will open on the Details tab, containing a form for adding a new currency denomination.
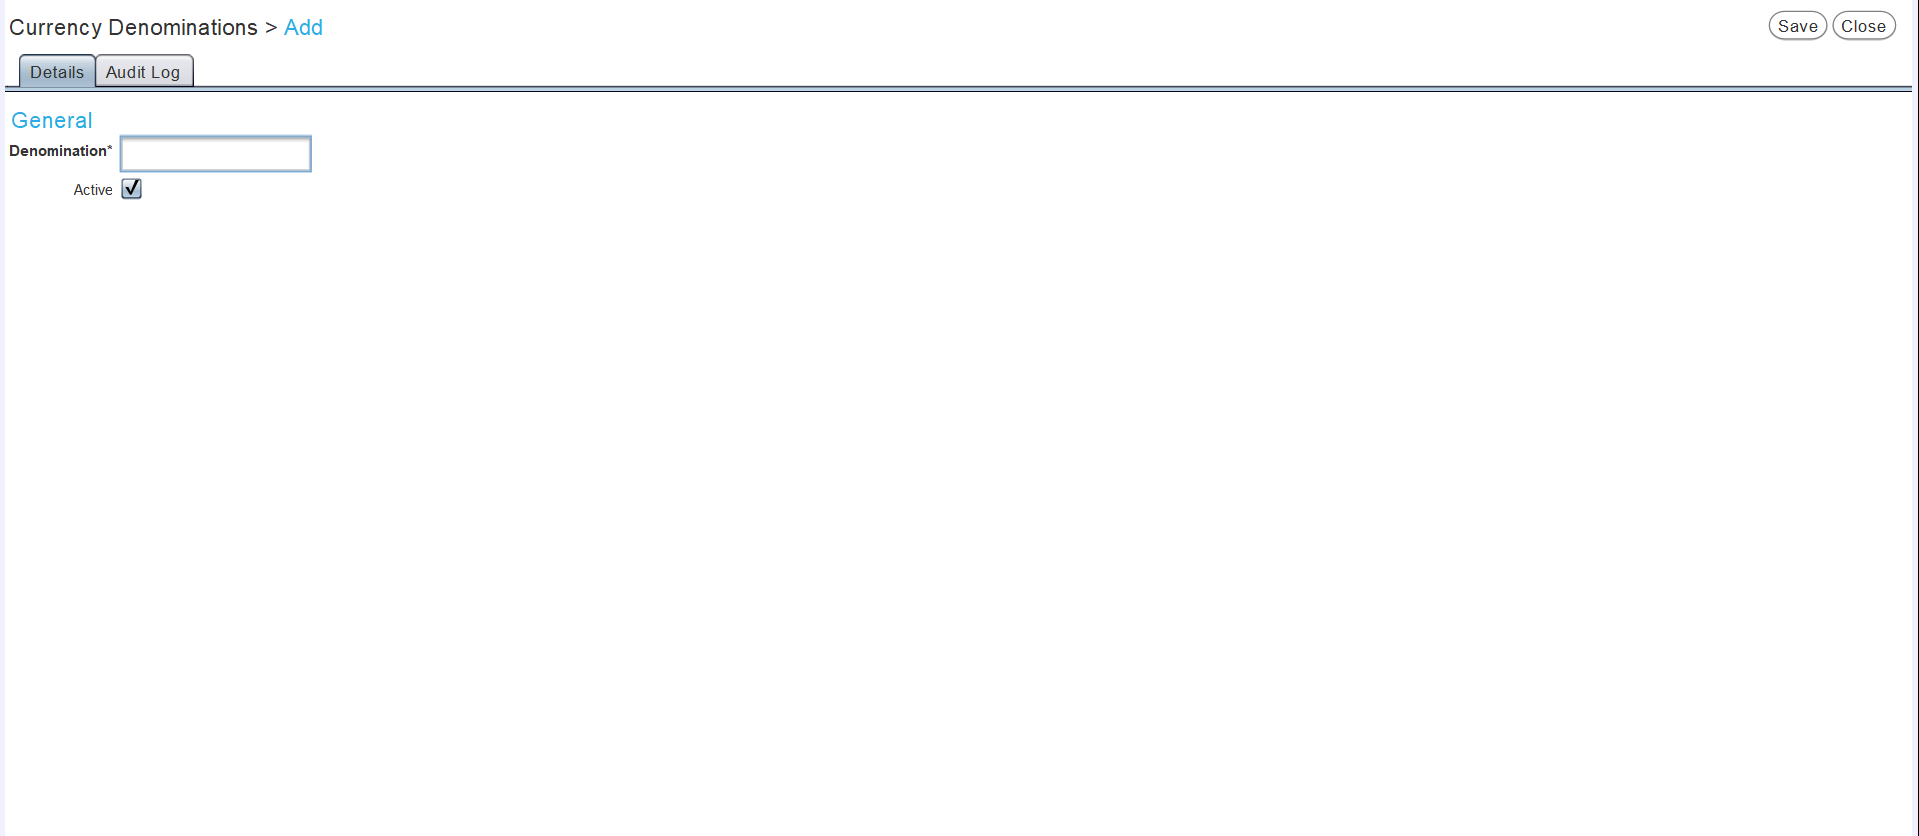
In the Denomination textbox, enter the value of the denomination as a decimal of the active currency.
For ten cents of a dollar, enter ".1" in the Denomination textbox.
The currency is automatically set according to the Locale system setting, which can only be edited by the Megabus Support Team.
Leave the Active checkbox ticked to enable currency denomination as part of the Cash Counting Tool.
Existing currency denominations can also be edited to replace old ones.
To save the new Currency Denomination and return to the search list, click on the Save active button at the top-right of the module window.