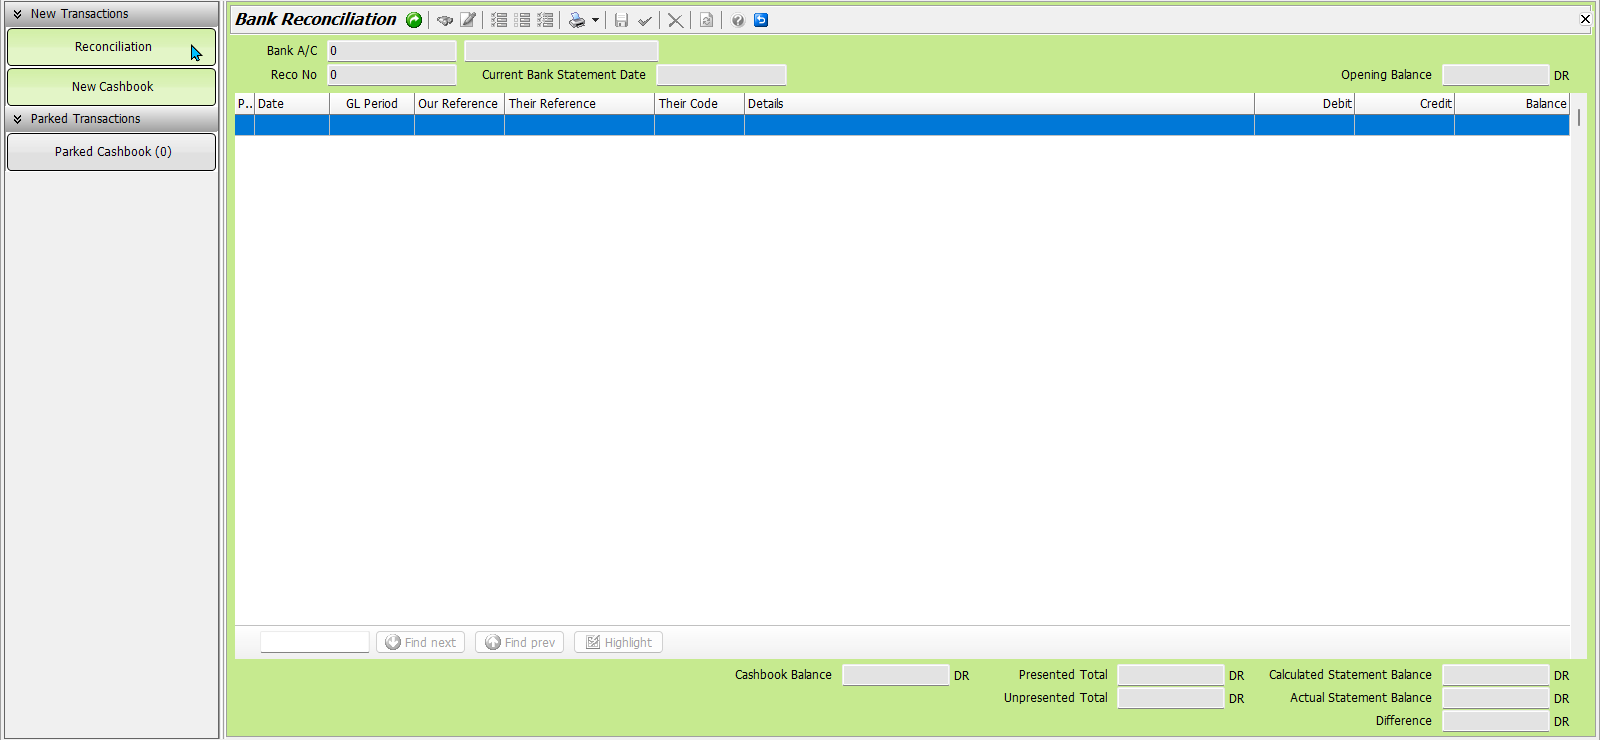
The Bank Reconciliation module can be accessed by selecting Main > Data Entry > Cashbook or Bank Reconciliation from the menu bar.

By default, the module will open on the Cashbook window.
To access bank reconciliation from, click on the Reconciliation button at the top-left.

Starting Bank Reconciliations
Main > Data Entry > Cashbook or Bank Reconciliation > Reconciliation
To begin a new bank reconciliation, click on the Start button at the top of the module window.

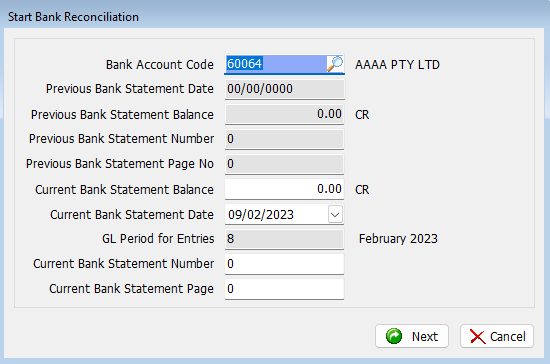
The Start Bank Reconciliation pop-up window will open.

The Bank Account Code at the top should automatically be set to the business's main account, although it can be changed if reconciling a different account.
The Previous sections immediately below show information about the previous reconciliation.
In the Current Bank Statement Balance textbox, enter the balance of the bank statement you are reconciling.
Use the drop-down calendar picker below to select the closing date of the statement you are going to reconcile.
The relevant GL Period will be automatically filled in below.
In the Current Bank Statement Number and Current Bank Statement Page fields below, enter the statement and page number of the statement you are going to reconcile.
Megabus recommends reconciling bank statement pages one at a time to make it easier to locate and fix any issues if they occur.
To begin the reconciliation, click on the Next button at the bottom-right of the pop-up window.
Reconciling Transactions
Main > Data Entry > Cashbook or Bank Reconciliation > Reconciliation > [Reconciliation]
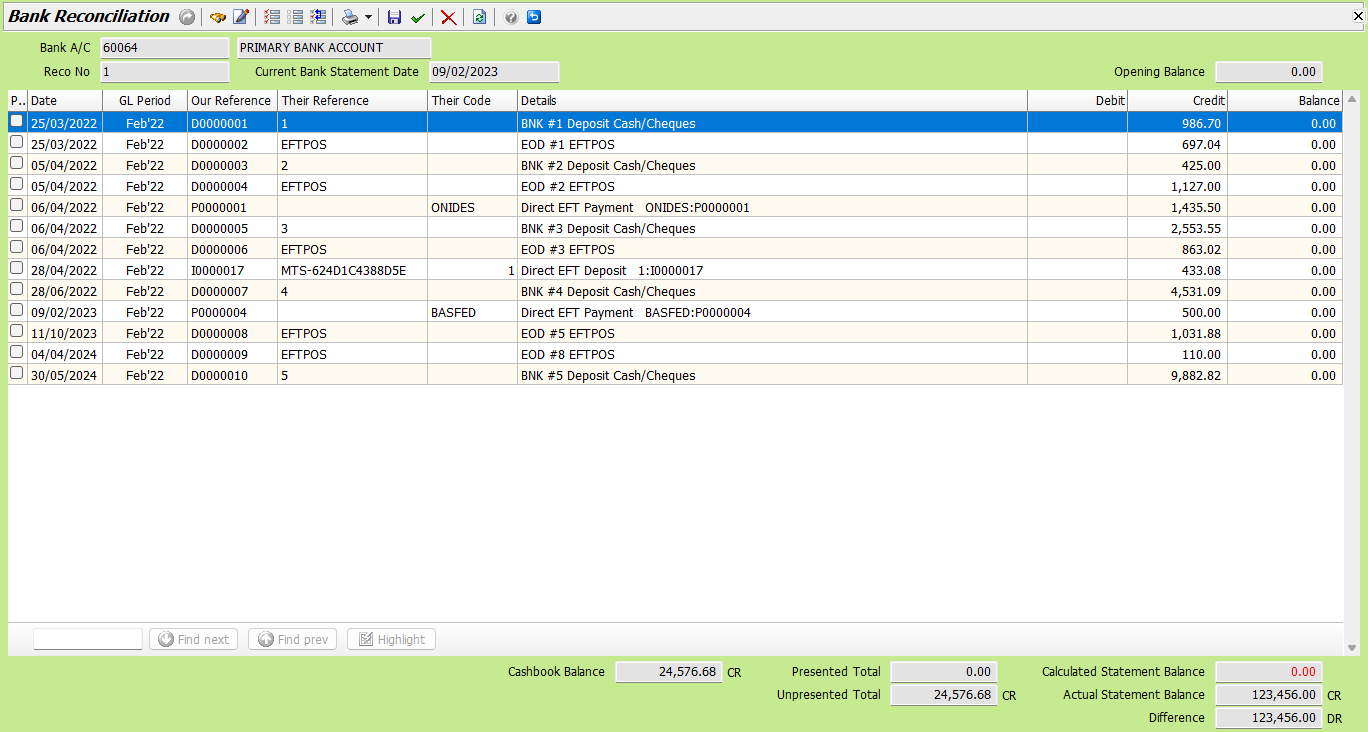
The Bank Reconciliation list will open showing a list of unreconciled transactions recorded in GTX between the last bank rec and selected statement date, organised by date.
Any other unreconciled transactions will also appear greyed out below.

The current Cashbook Balance is shown at the bottom of the module window, along with the Presented and Unpresented Totals.
The Calculated and Actual Statement Balances, along with their Difference, are shown at the bottom-right.
Transactions can be presented by ticking the relevant Presented checkboxes on their left, which will add their amounts to the calculated statement balance.
Transactions can be quickly presented by selecting them in the list and pressing the spacebar on your keyboard. The selection will automatically move to the below transaction, which can again be presented by pressing the spacebar.
Transactions can also be presented or unpresented in bulk using the Present All, Unpresent All and Invert Presentations buttons at the top of the module window.
Once the Calculated Statement Balance and Actual Statement Balance match, the bank reconciliation can be closed by clicking on the Finalise button at the top of the module window.
Although bank reconciliations cannot be finalised until their balances match, they can be saved and resumed at a later date by clicking on the Save icon at the top of the module window. To resume the reconciliation, re-open the module and click on the Start icon at the top.
If you are having issues finalising a bank reconciliation, double click on Reminders at the bottom of the GTX window to open the Reminders module, and check for any Banking Register Not Posted or EOD Not Posted alerts. If there are any, please contact the Megabus Support Team.
Adding Missing Transactions
Main > Data Entry > Cashbook or Bank Reconciliation > Reconciliation > [Reconciliation]
Discrepancies between the calculated and statement balances may occur due to transactions that have not been recorded yet or bank transactions, such as interest or bank fees, that have not been recorded in GTX.
If this is the case, add these amounts using the Cashbook module (which can be accessed by clicking on the New Cashbook button on the left).

Once the required entries have been added, return to the Bank Reconciliation list (by clicking on the Reconciliation button) and click on the Refresh icon at the top of the module window to add them to the list for presentation.
Presenting Transactions from Other GL Periods
Main > Data Entry > Cashbook or Bank Reconciliation > Reconciliation > [Reconciliation]
Missing transactions may also have been recorded in the wrong GL Period, and will appear greyed out on the Reconciliation list.
If so, the required transaction can be located by clicking on the Search icon at the top of the Bank reconciliation window.

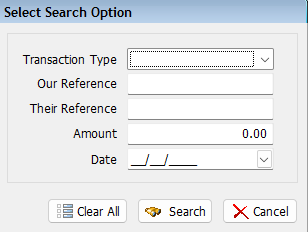
The Select Search Option pop-up window will open, which can be used to locate the missing transaction.

Searching by Amount is usually the quickest way to locate a transaction.
The incorrectly recorded transaction then needs to be reversed and re-recorded with the correct date, so that it can be presented for reconciliation.
Alternatively, the reconciliation can be voided and reopened with a later date, which will allow it to be presented. However, any other transactions for that period that do not appear on the statement will need to be in a suspense account for the changeover of the period.
::: - this is getting too technical and risky so I'm leaving it out
cancelling previous reconciliations
edit - modify date or add their reference buttons at top


