Marlin Tyre and Mechanical Workshop Software processes warranty claims as part of customer and supplier orders.
A warranty claim is first created as part of a customer order, where the customer may receive a refund.
Once refunded, a claim for compensation can be submitted to the relevant supplier as part of a supplier order.
The status of an item's warranty claims can be viewed by opening its master file (accessible by selecting Master Files > Items > Items from the menu bar) and clicking on the Warranty Claims tab at the top.

The different warranty claim statuses include:
-
Draft warranty claim items are currently on an open customer order.
-
Pending warranty claim items have had their customer orders Invoiced, but have not yet been added to a supplier order.
-
On Order warranty claim items have been added to supplier orders, including ones that have been submitted.
-
Closed warranty claim items have had their supplier invoices recorded.
Warranty claims are not counted as a part of ian item's Qty on Hand.
The number of items on a claim is recorded in the Transactions tab of its master file and can be viewed by changing the filter to Qty on Claim.
A report showing information about warranty claims for all items can also be generated through the Report Centre.
Refunding Warranty Claim Items
Daily Activity > Customer Orders > [Customer Order] > Order Details
Open the Customer Orders module (which can be accessed by selecting Daily Activity > Customer Orders from the menu bar).
Add a new customer order by clicking the Add action button to the top right of the module window.

Enter the customer and salesperson information as usual, and click on the Order Details Tab at the top of the module window
To the top right of the Order Details list, click on the +Claim button.

Use the picker that appears in the next empty cell to select which item the claim is being made for.
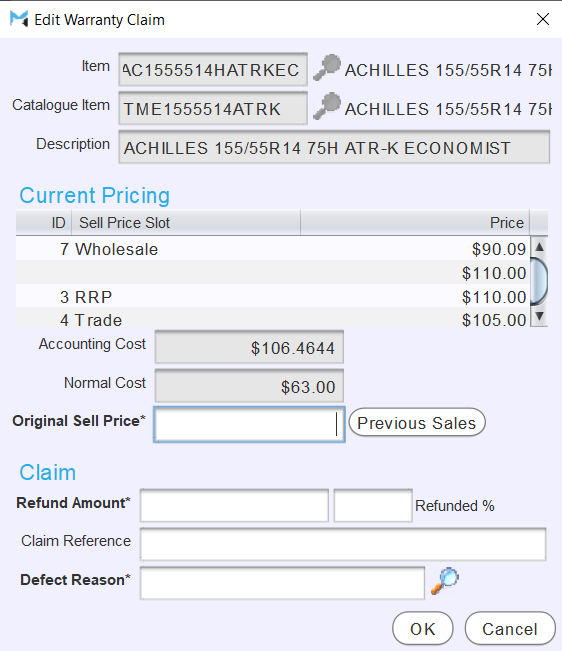
Once an item is selected, the Edit Warranty Claim pop-up window will open.

The item and pricing information is automatically filled in with the selected item's details.
In the Original Sell Price textbox, enter the price the Item was sold to the customer for.
Alternatively, click on the Previous Sales button to the right to select the specific transaction from a pop-up window containing a list of previous sales including the selected item for the customer and add its sell price to the Original Sell Price textbox.
The Current Pricing information above can be used to help calculate a refund amount for the item.
The Claim section below is used to apply the refund.
In the Refund Amount or Refunded % textboxes, enter the value of the customer refund as either an amount or a percentage.
The other refund value will be automatically calculated based on the entered Refund Amount or Refunded % value and the original sell price.
The Claim Reference textbox can be used to allocate a reference number to the claim.
Use the Defect Reason picker to select a reason for the warranty claim.
The list of defect reasons can be edited by selecting System > Text Lists > Lookup Lists from the menu bar and opening Defect Reason from the Lookup List Search list.
To save the warranty claim and return to the Order Details tab, click on the Ok button at the bottom right of the pop-up window.
The warranty claim will now appear on the customer order with its quantity and pricing information automatically filled in and its amount will be subtracted from the order total.
To edit a claim's details, click in its Unit Price (Inc Tax) cell to open the Edit Warranty Claim window.
A claim's quantity cannot be changed from "1". If additional claims need to be made for the same kind of item, they need to be added to the customer order as separate Claim details.
Once all necessary claims and other details have been added, invoice the customer order as usual.
Claiming Warranties from Suppliers
Open the Supplier Orders module (which can be accessed by selecting Daily Activity > Supplier Orders from the menu bar).
Add a new supplier order by clicking the Add action button to the top right of the module window.

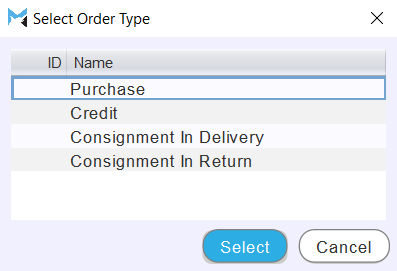
The Select Order Type pop-up window will open.

Select Purchase from the list of order types and click on the Select button at the bottom right.
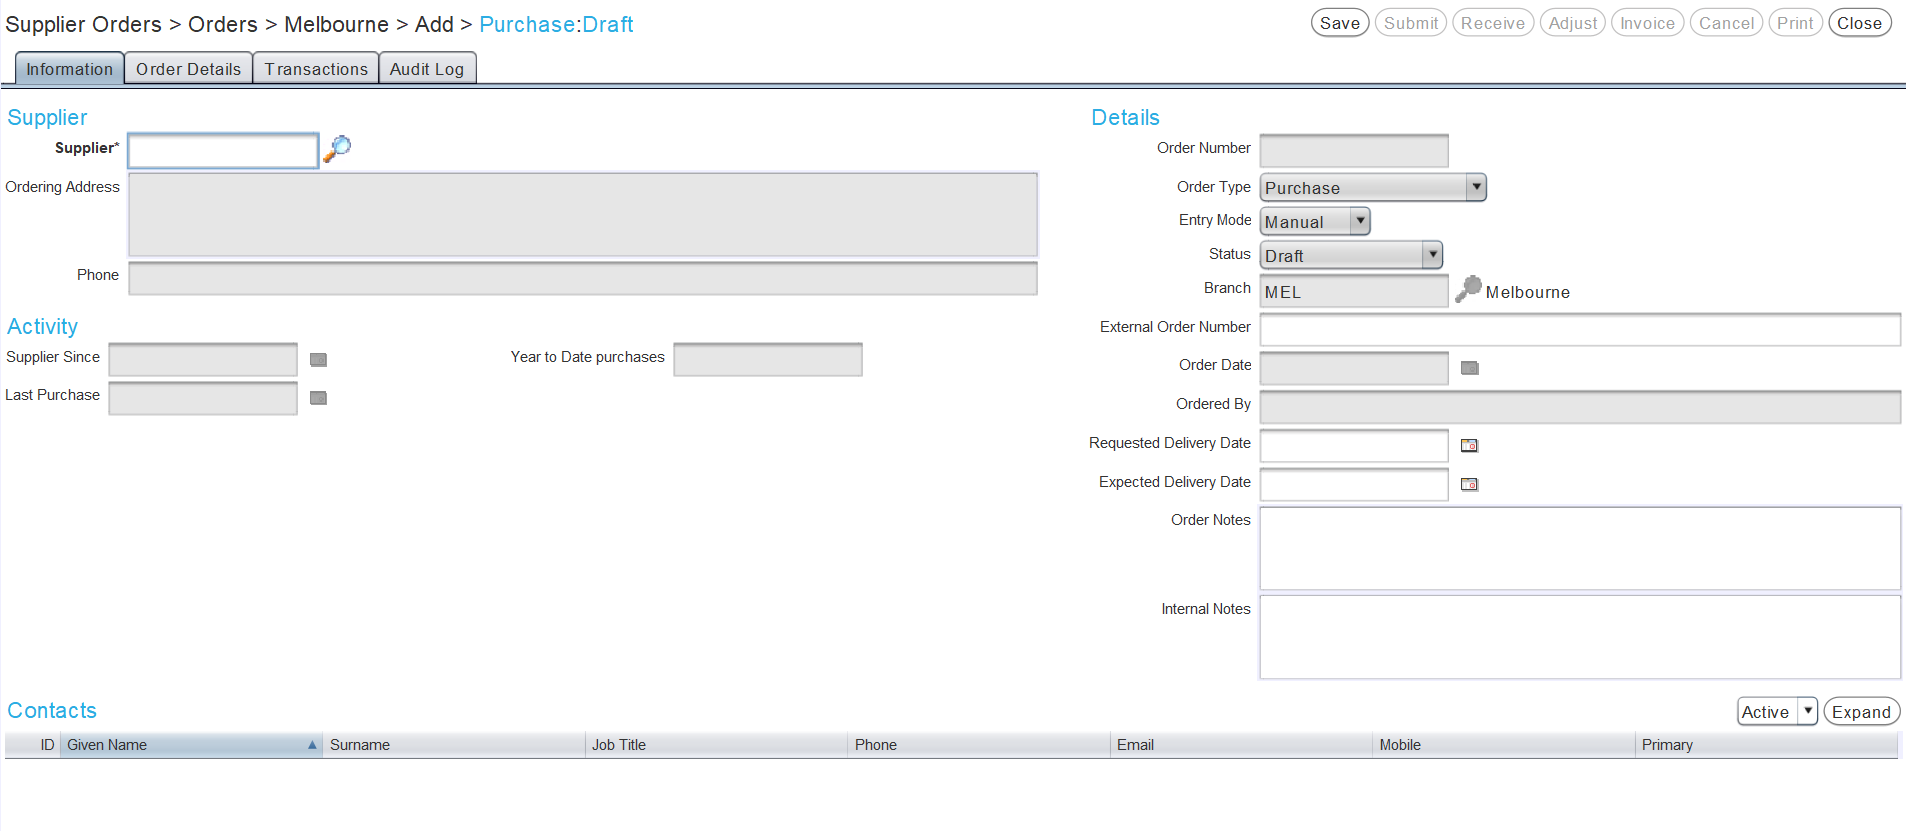
The new supplier order will open on the Information tab.

Use the Supplier picker to select the supplier the warranty claim is being made from.
At the top of the Supplier Order window, click on the Order Details tab.
To the top right of the Details list, click the +Claim action button.

Use the picker that appears in the Item column to add the refunded item to the Details list.
Refunded items will only appear on the +Claim picklist after their customer orders have been Invoiced.
Claims can be submitted separately or as part of a larger purchase order. If submitted as part of a larger order, the value of the claim will be subtracted from the order total.
Once all the required details have been added, submit the supplier order as usual.
Once submitted, the claim will be listed as Pending on Warranty Claims Reports and as On Order in the item's Warranty Claims tab in the Items Master File.
Accepted Warranty Claims
Daily Activity > Supplier Orders > [Supplier Order] > Invoice
If the supplier accepts a warranty claim, the order can be invoiced as usual.
If there are other purchases on the supplier order in addition to the warranty claim, then its total amount may not be a credit.
Rejected Warranty Claims
Daily Activity > Supplier Orders > [Supplier Order] > Invoice
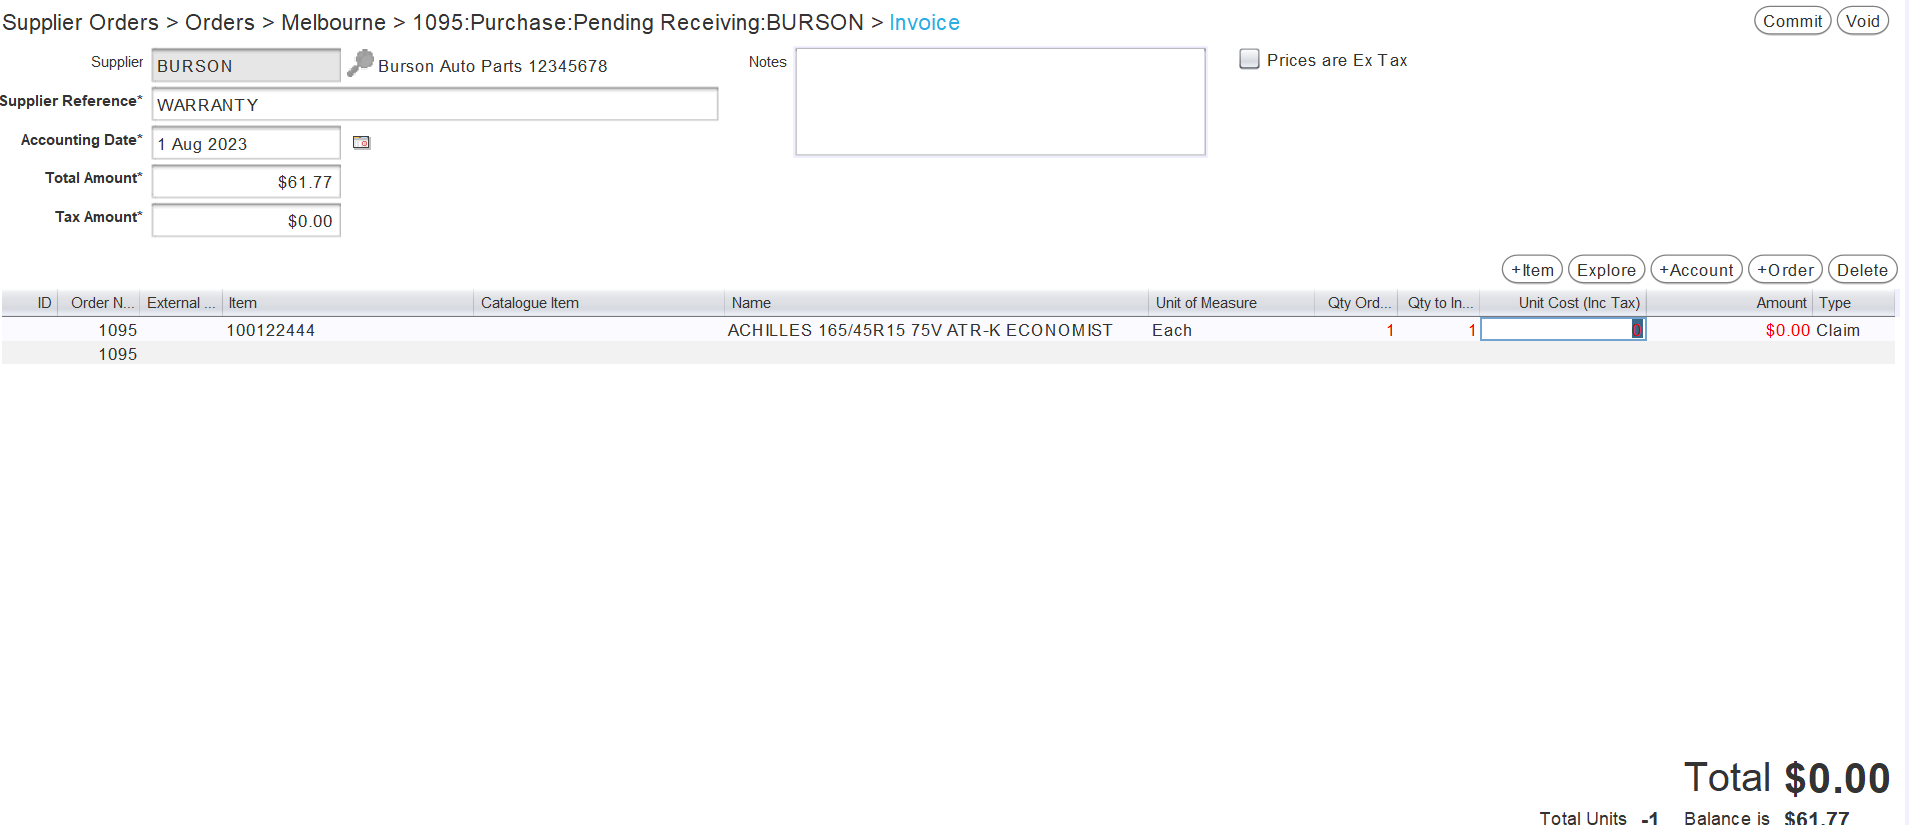
If the supplier rejects a warranty claim, then its Unit Cost on the Invoice list needs to be changed to "0".

The Total Amount in the textbox above may also need to be adjusted to match the new order total.
A note about the rejection can be entered in Notes textbox at the top, if desired.
Once the adjustments have been made, invoice the supplier order as usual.
Once committed, the warranty claim will be marked as Closed.